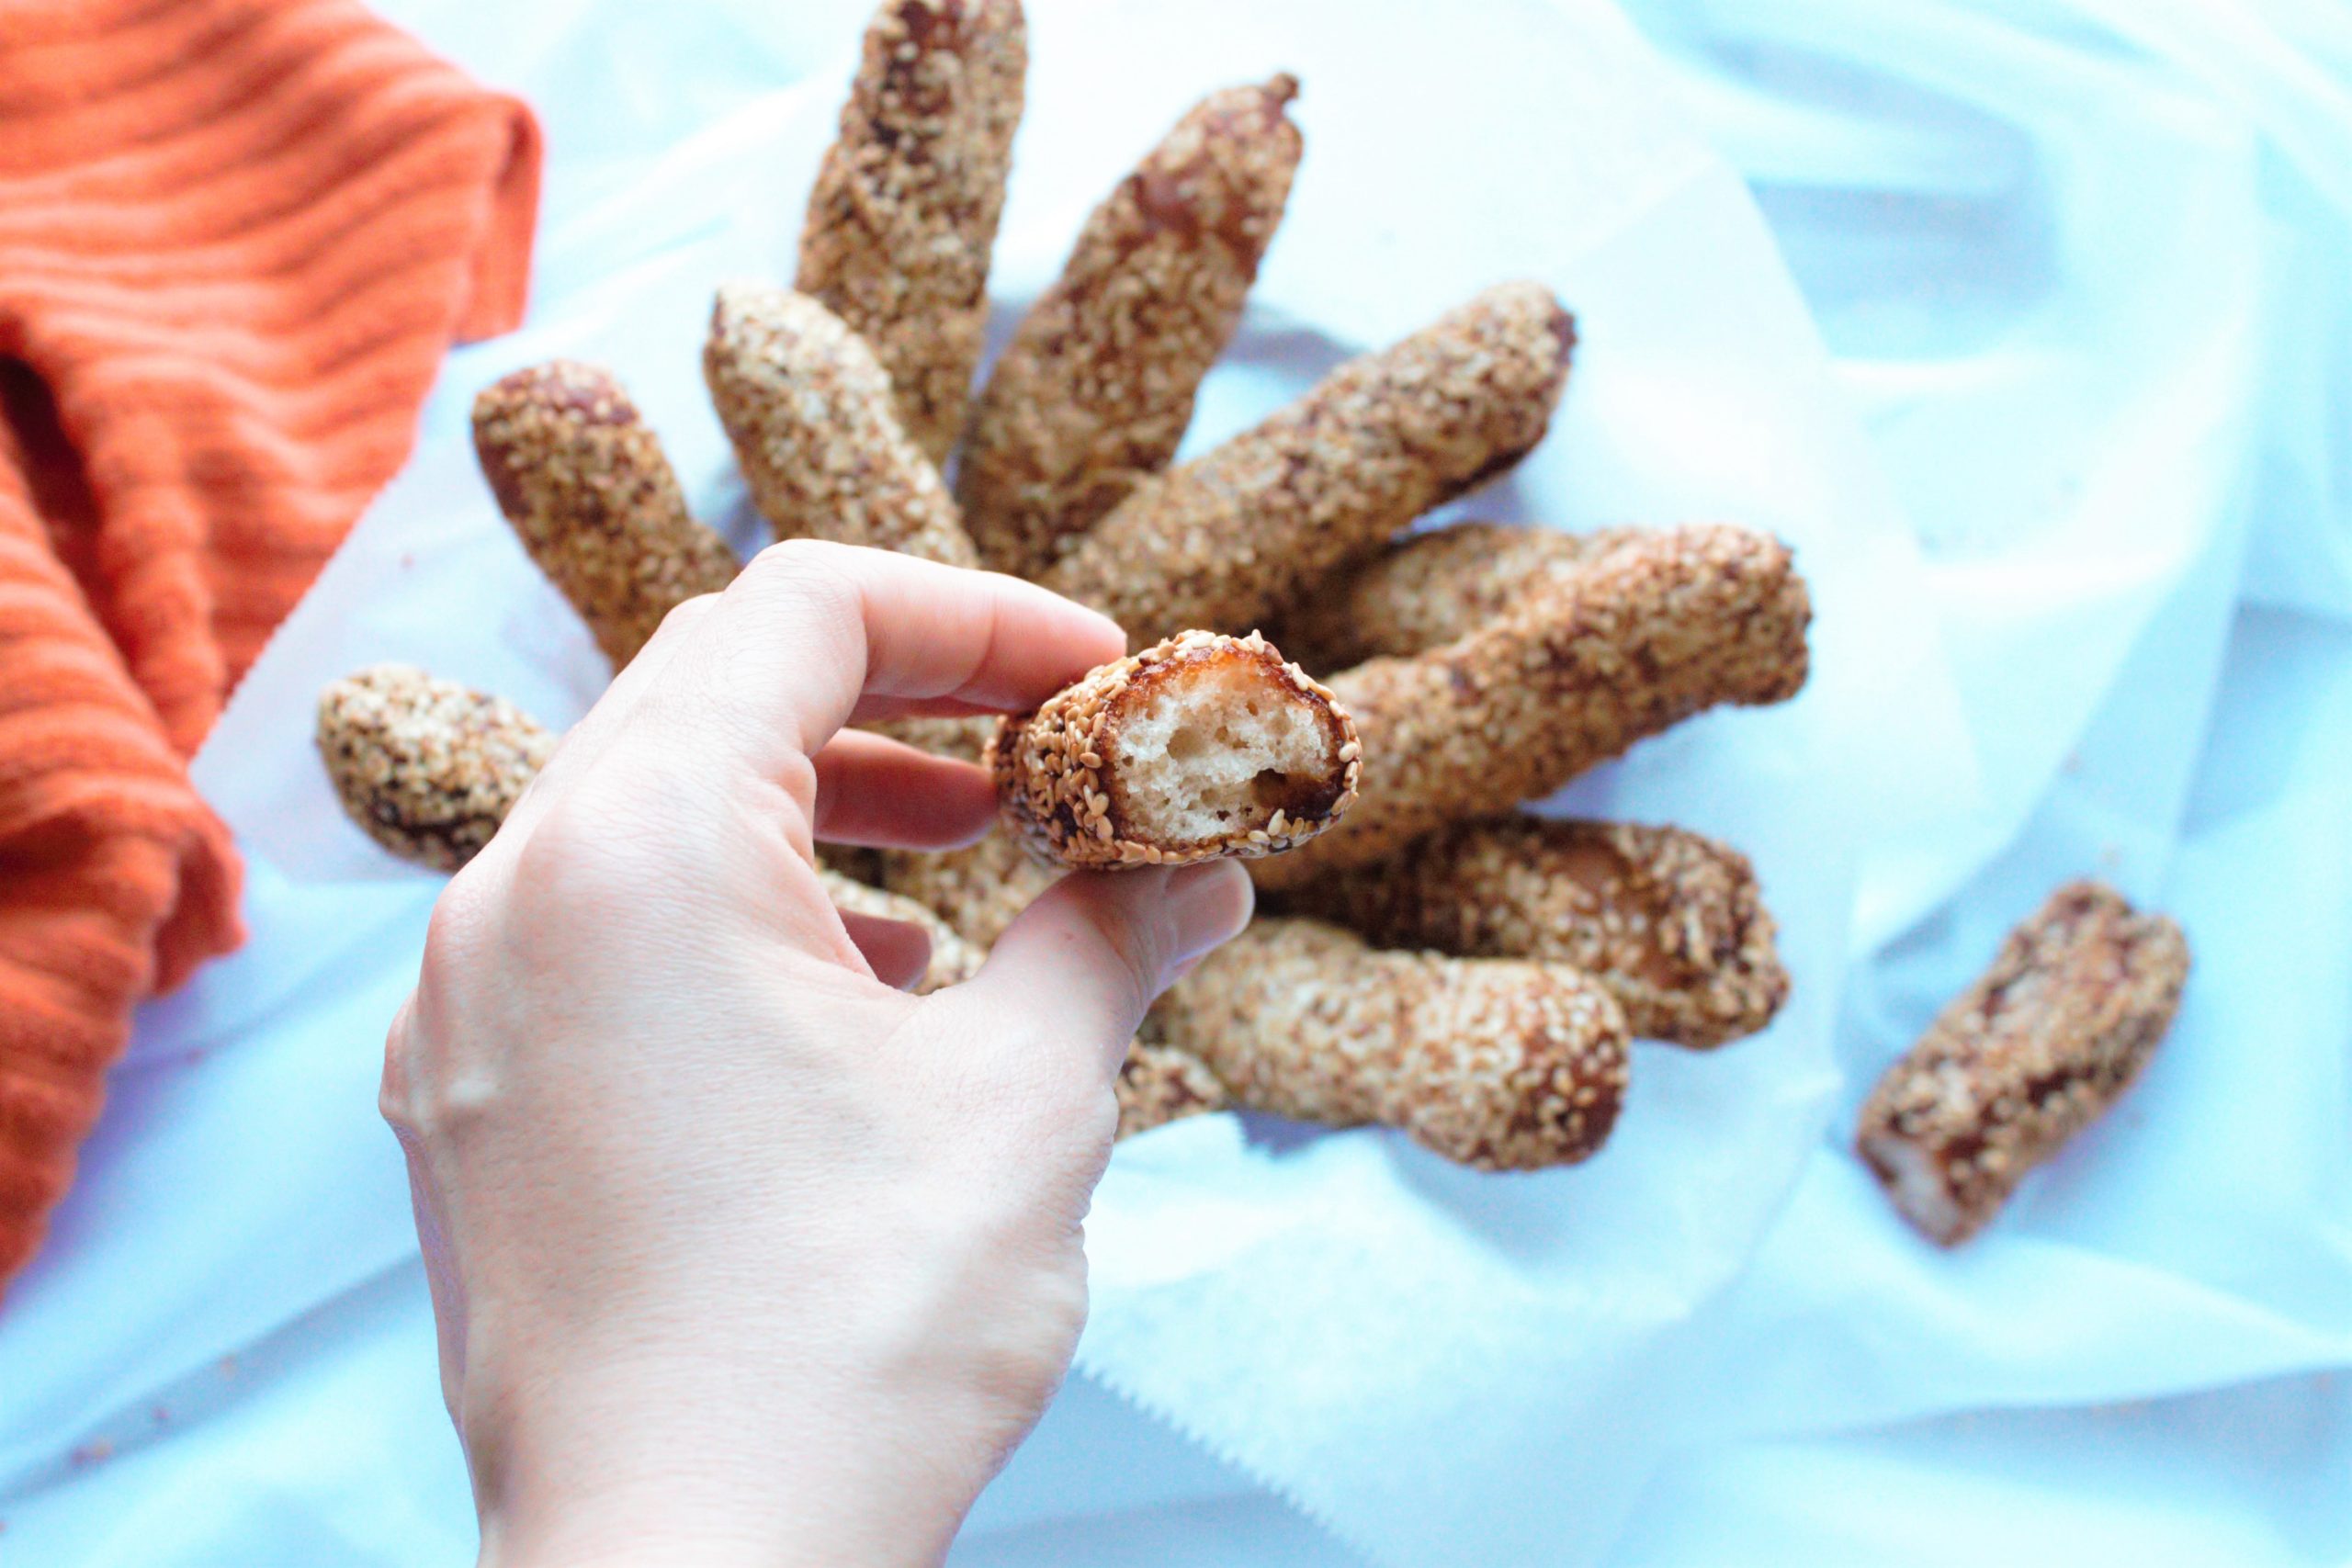
This Gluten Free Donuts Recipe is a Middle Eastern vegan donut that is slightly sweet. It makes a wonderful gluten free dessert for any occasion. These gluten free donuts are drenched with toasted sesame seeds and deep fried. It has a slight sweet taste, and is perfect to serve over a cup of tea. These gluten free donuts are also known as zalabia around the Middle East.
WHAT WILL WE BE TALKING ABOUT
- History of zalabia or in our case gluten free donuts recipe of Middle Eastern Origin
- Allowing the gluten free donuts dough to rise
- shaping the donuts
- frying the donuts
UPDATE 1-11-22!
Sorry guys! There has been a slight mishap! I was checking the printable recipe, and it seems that I have forgotten to mention to add the apple cider vinegar and the olive oil into the dough after adding the yeast mixture. I had them listed in the ingredients list, but I totally forgot about the adding them in part. Oops!
No worries though! that problem is now fixed! phew! Both ingredients are now mentioned where they need to be added.
HISTORY OF ZALABIA OR GLUTEN FREE DONUTS RECIPE OF MIDDLE EASTERN ORIGIN
First of all, I cannot even begin to express to you all how exuberant and overjoyed I am over being able to create a gluten free donuts recipe, out of all, a zalabia recipe to share with all of you. I can already imagine all the happy people that are celebrating with me over this recipe.
The creation of this recipe means a lot to me. It is more than just a recipe. It holds very dear and valuable childhood memories to me.
Every year, around Easter time, my mom would make a giant, and by giant I mean about a 40 quart mixing bowl giant, amount of zalabia donuts dough.
She would sprinkle the top of the bowl with sesame seeds, dip her hands with water, grab some dough from the edge of the bowl, and stretch it into a long cylindrical donut.
She would place this stretched out dough into the hot oil, and my dad would be standing right there by her side, turning over the zalabia in the hot oil, and transferring the cooked ones into MULTIPLE cookie sheets and pizza pans.
By the end of the day, there were tons of zalabia donuts made. Enough to feed a large crowd. We children would gather there in the kitchen around my parents waiting for the zalabia to be ready for us to eat.
Even now, I can smell the zalabia and feel it’s texture in my mouth. We spent days eating zalabia donuts. We would eat it at breakfast time, after lunch, for snack, and dinner. And We would take it with us to school. We snuck it in whenever we could. It was divine!
Why Did I Create This Recipe?
Being on a gluten free life due to celiac disease did not stop me from dreaming about eating zalabia, and all the delicious food that I grew up on.
In fact, it is this dreaming that drove me to creating this amazing gluten free donuts recipe, or zalabia that so resembles my childhood zalabia in pretty much every aspect.
And because of this, I am now able to share with you this amazing gluten free zalabia recipe. Now, you too now can join me in celebrating this amazing food and amazing memories. How you may ask? By making this recipe and savoring every bite of it.
There are many recipes that are known by zalabia in the middle east. This is the zalabia recipe that comes from the southern region of Lebanon. It is traditionally made as a celebration of the day Jesus was baptized.
ALLOWING THE GLUTEN FREE DONUTS DOUGH TO RISE
This gluten free donuts dough is strictly a yeast dough. There are no other leavening agents. So it is very important to allow the dough to rise for two reasons.
The first reason to allow the dough to rise would be to develop those beautiful air bubbles on the inside of the donuts.
The second reason for rising this gluten free dough is to develop the yeasty flavor in the zalabia. If you have eaten prepackaged gluten free products, you will notice that most of them lack in the flavor department.
The yeast flavor is essential for achieving the proper zalabia donut flavor; especially the flavor that we have been once used to in the wheat zalabia, and donut version.
Even if you have been gluten free since your childhood, you will appreciate this flavor.
Using yeast as our rising agent will give the zalabia the proper bread texture. Using baking soda, or baking powder will give you a caky texture rather than a bread texture.
It is important to allow the dough to rise before shaping the zalabia rather than after the shaping process.
If you allow the dough to rise after shaping it, you might not be able to transfer the zalabia into the hot oil for frying. This might cause the donuts to fall apart during the frying process.
Make sure to cover the dough with a plastic wrap. This will seal in the moisture and prevent the dough from drying out.
Once the zalabia dough is doubled in size, it is ready to be used.
SHAPING THIS GLUTEN FREE DONUTS RECIPE INTO ZALABIA DONUTS
Gluten free donut dough is pretty sticky. Just like most gluten free baked goods, the dough resembles more of a batter than an actual dough.
How do you prevent the dough from sticking to your hands and everything else? You simply need to oil your hands until they are dripping with oil every time you touch the dough.
Before you begin shaping the zalabia/donuts, make sure to spread out a piece of parchment paper on a clean counter surface that is closest to the area where you will be frying the donuts.
After all, you will be picking up the zalabia/donut and placing it into the oil. You don’t want the frying pan to be too far away. If it is, you may risk tearing the donut in the process of transferring it to the hot oil.
What Should You Do If You Do Not Have a Close Enough Counter Surface?
Line a cookie sheet or a pizza pan with some parchment paper, an place the formed zalabia dough over it.
Also before you begin, ensure that you have a flat plate filled with toasted sesame seeds to dip the zalabia in, as well as a sheet pan with cooling racks over it. The sheet pan is there to catch any oil that drips from the fried zalabia donuts.
Shaping the Donuts
To shape the donuts/zalabia, cover your hands with oil until they’re almost dripping. Make sure your finger tips are covered as well.
Take a handful of dough and gently roll it between your hands. Form a log of about 1 inch to 1 inch and a half in thickness.
Dip one long side of the log into the organic toasted sesame seeds, and lay the donut log onto the parchment paper, sesame seeds side down. The sesame seeds will act as a barrier between it and the parchment paper. They will also prevent any possible sticking to the parchment paper.
Repeat this step with the remaining dough. Make sure to cover your hands with oil every time you are about to take another handful of dough.
I would have loved to show you this process with pictures. However, my hands were super oily, and I did not want to risk dirtying the camera.
As you roll the dough between your hands, it will feel a little flimsy. Fret not. gentle is the key to shaping these gluten free donuts.
If your hands are getting sticky, wash them thoroughly, and oil them heavily before you begin shaping the dough again.
Do not allow the zalabia/donuts to rise for longer than 10 to 15 minutes after shaping it. You can proceed with the frying process directly after shaping the donuts. The hot oil will also allow the donuts to rise during the frying process.
FRYING THE GLUTEN FREE DONUTS
Once all the dough is formed into these log shaped donuts, set a large frying pan with vegetable or coconut oil. Preheat to medium heat. I didn’t have a thermometer, so I couldn’t tell you the exact temperature. However, I could guess and say it was around 350 F.
Once the oil is hot enough, about 350 F, begin frying the gluten free donuts. Add three to 4 pieces at a time. Do not overcrowd the pan. Rotate them halfway through the frying process.
When done, the zalabia/donuts should have a dark brown burgundy color. Remove the donuts from the frying oil, and set it onto the drying racks. Repeat with the remaining donuts.
You may need to adjust the heat through the frying process. The oil does get hotter the longer it stays in contact with the heat.
Allow the donuts to cool completely before serving. Once done, turn of the heat, and carefully set the pan filled with hot oil away from the hot burner.
MORE DELICIOUS GLUTEN FREE RECIPES
Vegan And Nut Free Gluten Free Soft Pretzels
Gluten Free Mediterranean Date Cookies – Maamoul Recipe
You might also like…
Gluten Free Sourdough Bread Rolls


Gluten Free Donuts Recipe – Middle Eastern Vegan And Nut Free Donuts
Ingredients
Equipment
Method
- Into a medium bowl, add the 636 g of boiling water with the anise seeds, and allow it to sit until the liquid reaches a lukewarm temperature.
- Meanwhile, into a large bowl, add in the brown rice flour, cornstarch, potato starch, psyllium husk, xanthan gum, salt, brown sugar, mahlab, and nutmeg. Mix using a whisk until well combined.
- Once the anise tee is at a lukewarm temperature, using a fine sieve, strain 530 g of the tea into a medium bowl. Add in the yeast, mix, and set aside in a warm place for 10 minutes.
- When you notice froth forming on the tea/yeast mixture, it indicates that the yeast is active and you can proceed with the next step. If your yeast is inactive, you will have to discard it and purchase new yeast.
- Assuming the yeast is active, add in the yeast/tea mixture into the dry mixture along with the 10 g apple cider vinegar, and 30 g extra virgin olive oil. You can mix using your hands or a wooden spoon. The mixture will be sticky, but that’s how it should be.
- Cover the zalabia/donuts dough with a plastic wrap, and allow the dough to rise until doubled in size.
- Lay out a flat piece of parchment paper across your counter surface that is closest to the stove where you will be frying the zalabia/donuts.
- Fill a flat, medium plate with toasted sesame seeds.
- Set a cookie sheet with cooling racks over it to allow the oil from the fried donuts/zalabia to drip over it.
- Once the dough is doubled in size, pour some vegetable oil into a small bowl, and use it to oil your hands. Your hands should be very oily every time you come in contact with the dough; otherwise, you will end up with a sticky mess.
- Ensure your hands are super oily, especially your fingertips. Take a handful of the dough and gently roll it between your hands to form a log of about 1 inch to 1 inch and a half in thickness. Dip one long side of the log into the sesame seeds, and lay the zalabia/donut log onto the parchment paper, sesame seeds side down. Repeat this step with remaining dough.
- Once all the dough is formed into these log shaped donuts, set a large frying pan with vegetable or coconut oil, and preheat to medium heat.
- Once the oil is hot enough, about 350 F, begin frying the zalabia/donuts by adding three to 4 pieces at a time. Do not overcrowd the pan. Rotate them halfway through the frying process. When done, the donuts should have a dark brown burgundy color. Remove the zalabia/donuts from the frying oil, and set it onto the drying racks. Repeat with remaining donuts.
- Allow zalabia/donuts to cool completely before serving. Once done, turn of the heat, and carefully set the pan filled with hot oil away from the hot burner.
Notes
Disclosure: Some of the links in this post are “affiliate links”. This means if you click on a link and purchase the item, I will get an affiliate commission. It will not cost you any extra money, but it will help me pay for this website, and it will help me to keep providing you with helpful articles such as this one. I only post links to products that I personally use and love, or to products that I wish I could have, and that could be of value to you. The information that I provide you with, my blog, videos, and many resources are free.


Be the first to reply