
Starting a garden plot from scratch can be an intimidating process, but it really does not have to be this way. There are many different approaches to preparing an area for planting. This method does not require any heavy tools. On the contrary, you probably already have all the tools you need at hand. It takes six simple steps to get your vegetable or flower garden ready.
HOW TO PREPARE AN AREA FOR A GARDEN
- Remove shallow rooted plants using a tool that you probably already have at hand.
- Dig out any remaining deep rooted plants
- Smooth out the area and remove the pulled up weeds.
- Create a layout of your garden
- Prepare the soil for planting
- Stop the weeds from coming back
REMOVE SHALLOW ROOTED PLANTS USING A TOOL THAT YOU PROBABLY ALREADY HAVE AT HAND
Whether you live in the suburbs or in the country, you probably have this tool which will save you so much time and energy on your part to get your garden ready for planting. Perhaps it had never occurred to you to use it in this manner. It is a tool that you use every week to make your lawn looking pristine. No, it is not a lawn mower. It’s a weedwhacker, or whatever you want to call it.
When you are using a weedwhacker to prep for a garden, you will not be using it in the same manner you do when you trim the edges of your lawn. The technique differs a bit, but I assure you that it will get rid of most if not all shallow rooted plants and some deep rooted plants.
This technique is not meant to get rid of grass. If you are trying to turn your lawn into a garden, this technique will not work. This will only work on your average weeds.
If you have grass, you will need to remove it either by using a shovel, or renting a sod remover.
However, if you are faced with many shallow rooted weeds, that would not be your dandelion and thistle, a weedwhacker works perfectly on these types of plants.
The weedwhacker that I love to use is Greenworks PRO 16-Inch 80V Cordless String Trimmer. It is powerful enough to do the job, it is pretty light, no vibration whatsoever, and there is no gas blowing in my face, thank you!
The trick is to tilt it the right way when you are using it.
When you use a weedwhacker, you are usually using it with the head parallel to the ground. In that case the threads act as a lawn mower, and shop the grass or weeds rather than pulling it up.
In order to remove the weeds from the roots you need to tilt the head at around 35 to 45 degree angle. This will allow the threads to “till” into the ground removing the weeds from the roots.
If you have something with deep roots, you can tilt the weedwhacker head to a 90 degree angle with the head facing away from you because who wants dirt, weeds, and possibly rocks flung up their face?
This can get messy because you are flinging up dirt and weeds all over the place. So get ready for that. Make sure you wear safety glasses and a good helmet just in case you end up flinging any rocks by accident.
DIG OUT ANY REMAINING DEEP ROOTED PLANTS
I would be lying if I said that the weedwhacker is going to eat up all your weeds. This is simply not true. There are some plants that have extremely long tap roots such as dandelion and thistles to name a few, and some plants that have deep multi roots such as grass. unfortunately, The weedwhacker cannot rid you of these plants.
In this case you would want to use a regular plain old shovel with a pointed end to help you dig those weeds out. Dig deep around the root ball of the plant, and pull it out. Most of the time, you should be able to pull it out in just one dig with the shovel.
To remove any shallow rooted plants that you might have missed, you can use a hoe. Scrape the soil a few inches below the surface using the hoe. This should pull up any shallow rooted plants.
This step is an extra measure that you should take to make sure that those nasty weeds are not going to come up again.
SMOOTH OUT THE AREA AND REMOVE THE PULLED UP WEEDS
Using the help of a metal rake, you’ll want to smooth out the area and rake up the the weeds you have pulled up.
Some weeds are resilient. Their roots can search for moisture, and place themselves back in the dirt. They will be growing and thriving again in just the matter of days. So you want to make sure to remove those pesky weeds out of your garden before they get the chance to root themselves in again.
After you have gathered the weeds, toss them in your wheelbarrow or a bucket. You can either throw them in the trash bin, or pile them in a compost pile, just make sure to till it often and water it if you do chose the compost pile approach to prevent those weeds from coming back.
Once you have gotten rid of the weeds completely, you can smooth out the surface using the back end of the rake. as a side note, The front of the metal rake will also help you get rid of any shallow rooted weeds, and of weeds that are still at their infancy stage.
Smoothing out the surface is important. It will prevent water from pooling around some plants and escaping away from other plants. It will also look more esthetically pleasing and will give you a good surface to work on for the next step.
CREATE A LAYOUT OF YOUR GARDEN
Before you start planting, it is a good idea to go ahead and create a layout of your garden. You can do that either on a piece of paper, or in your mind. I like to draw out my ideas on a piece of paper to help me get a better visual and avoid any future mistakes.
As you create the layout, take into account the number of plants you want to plant, the spacing between those plants, and the fact that you do have to walk between them to get your vegetables or do some maintenance work like weeding, pruning, watering and such.
I like to have about 3 feet space between my vegetable rows. As the plants grow they will swallow some of that space leaving me with about 1 1/2 to 2 feet of walking space. For me this is plenty to allow me to do what I need to do.
In addition to that, I like to have a good 4 to 5 feet of space around my vegetable rows, but not in between them. This makes it easy to bring in a wheelbarrow, to string in a hose, or just to take a stroll around the garden and enjoy the beauty.
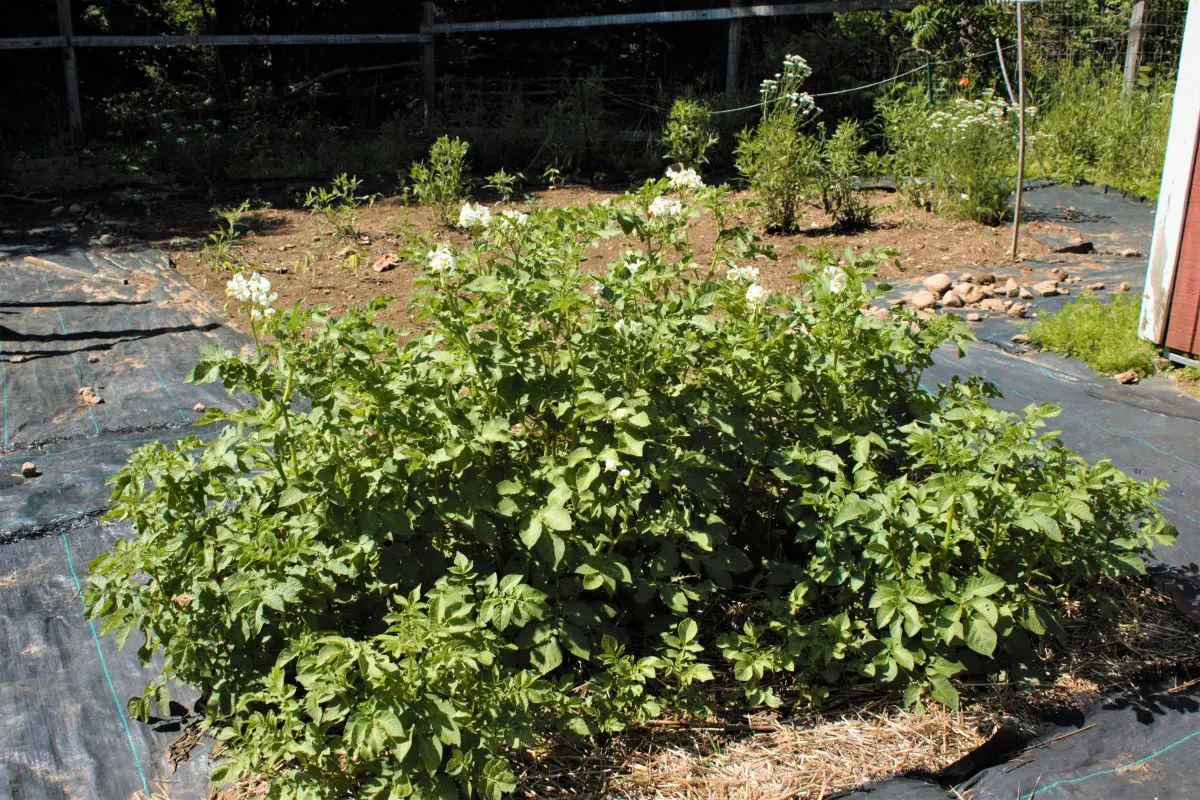
I like to use landscape fabric for the walking paths because it prohibits weeds from popping up. Less weeding for me! But not all landscaping fabric is created equally. The landscaping fabric that I used in previous years gets easily unraveled leaving me with plastic and a mess in my garden.
My favorite landscaping fabric to use is the DeWitt P4 . It is long lasting, and does not come unraveled!
Another important factor that you absolutely need to consider when laying out your garden is the sun. The sun is the most important factor in a vegetable garden.
You need to observe in which direction does the sun rise, and which direction does it set. Do you have shade in that area? If so, how much shade? is it all day? is it just for a few hours? What kinds of plants are you planting? Are they tall, short, or a mix of both?
Those are all important questions to ask yourself before you layout your garden. Make sure that your plants are getting the maximum amount of sunlight they need.
I like to plant my rows facing east to west. This allows the plants to receive all the sunlight they need.
Make sure to plant your tall plants either on the north side or on the west side of your rows. My vegetable rows usually consist of either two to three rows of plants spaced appropriately.
PREPARE THE SOIL FOR PLANTING
To do so, you could use either manure, compost, fertilizer, or a combination of either compost and fertilizer, or manure and fertilizer.
The fertilizer is going to provide any missing ingredients that the manure or compost do not have. Plants need a variety of food just like we do. Providing them with that variety is going to ensure that you will have healthy plants and a maximum yield.
Here you also get to choose whether you go organic or synthetic. I like the organic route because I feel the safest with. I also want to protect mine and my family’s gut health, so organic is key for me.
It is also important to keep in mind that some plants may not require as much fertilization as other plants. I personally like to amend the soil individually for each plant. This gives me control over what goes to which plant, and it will ensure that each plant is getting proper fertilization.
I also want to avoid fertilizing the weeds. I would rather get a healthy crop of vegetables and flowers than a healthy crop of weeds. which brings us to the last step.
STOP THE WEEDS FROM COMING BACK
This will not give you a 100% guarantee of no weeds, but it will sure minimize the weeding to minimal and a lot less frequent. I can assure that with this technique weeds will not overwhelm you like they wood without the use of this method.
This method will guarantee you peace of mind when it comes to weeds.
All This method requires is some cardboard, and mulch or straw. You can get free mulch from tree removers. They want to get rid of it any ways. You can ask them to drop it off at your house. Most of the time it is free of charge.
Just make sure that you are getting clean mulch that does not have any diseased trees or invasive species.
You can do this either after or before you plant. Lay out some clean cardboard that is free of paints and plastic on to the ground. Make sure that the cardboard overlaps itself with about half a foot to prevent any weeds from popping in between the cardboard.
Cover the top of the cardboard with mulch, and soak it down pretty good with water. This will prevent the wind from blowing it away, and it will also make it easier to cutout holes into the carboard where you would like to plant.
If you decide to plant after you lay out the cardboard, scooch the mulch or straw over a bit, cut out a whole for your plant, dig into the soil, amend, plant, and place the mulch back around the plant.
CHECK OUT MORE STUFF
How To Grow Herbs From Seeds Indoors For Beginners
Nut Free- Vegan – Gluten Free Focaccia Bread Recipe
Mediterranean Okra Stew With Beef


Be the first to reply