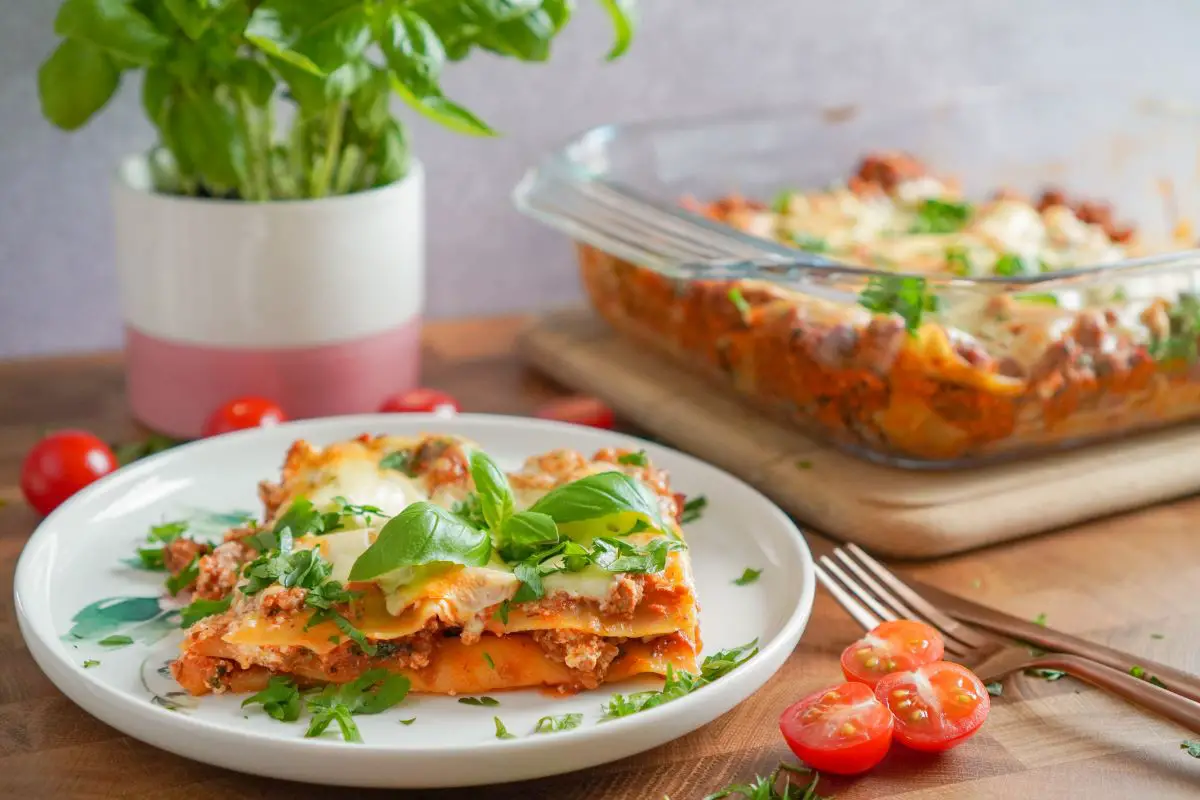
This Homemade Lasagna bursts with delicious flavors. It is creamy, it’s saucy, it’s delicious! No one ever said making lasagna was easy, but it sure is worth it. Every bite is worth it.
This recipe has been slightly updated since last published. If you watch the video, you will find the difference.
Ingredients For Homemade Lasagna
- Homemade Pasta Sauce
- Cooking spray
- ½ cup shredded mozzarella cheese
- 2 tablespoons parmesan cheese
- 12 Gluten free lasagna noodles or 1 package
Cheese Mixture
- 32 ounces ricotta cheese
- 1 cup shredded mozzarella cheese
- ¼ cup parmesan cheese
- 1 tablespoon parsley
- ½ teaspoon salt
- 1/8 teaspoon ground nutmeg
- ¼ teaspoon black pepper
- 1 teaspoon dried basil
- 1/2 cup milk of your choice
- 2 eggs (optional) I personally do not like eggs in my cheese mixture, so I just don’t use it.
Utensils
- Lasagna baking dish
- Rubber Spatula
- Ladle
- Oven Mitts
- Mixing bowl
- Wooden Spoon
- Aluminum foil
- Large Pot
- Colander
Preparing the Noodles for the Lasagna

This recipe is a little time consuming, but it is worth every bit of work. The first thing that you’ll want to do is to prep your lasagna noodles.
I will say though, not all gluten free noodles are created equally. My favorite noodles are the ones that are made with brown rice only, or brown rice and corn which comes second in my favorites .
Prep your noodles according to package instructions with the addition of some salt.
I will advise however, since you are going to bake your lasagna with a whole lot of sauce and cheeses and all sorts of yummy goodness, you probably are not going to want to fully cook the lasagna noodles as the package suggests.
Preventing Overcooking
What I personally like to do is to cook it for 1 to 2 minutes less than the package directions says. This prevents the noodles from being mushy and it gives you an excellent end result.
As all experienced gluten free cooks will tell you, do not overcook your pasta otherwise you’ll end up with a blob or a pile of mush.
The next thing that you’ll want to do is to stop the cooking process.
As soon as the noodles are done cooking, quickly drain and rinse under cold water.
Place the noodles back in the pot and fill the pot with some cold water. This will help the noodles to stay separate which will make the assembly process much easier.
Preparing the Filling
While your lasagna noodles are chilling, it is time to work on the filling.
Combine all the cheese mixture ingredients together and mix until everything is well combined.
Now I’ll say, I tried making lasagna with eggs in the cheese mixture many times, but I just do not like it. I find it much lighter and frankly the cheese mixture seems to stand well together without the help of the eggs; which I assume what the eggs are there to do (to help it stay together better).
You can try it out without the eggs, and let me know what you think in the comments down below.

Assembling the Lasagna
Now comes the assembly which is my favorite part. You can use any pasta sauce. However, I would venture to say that if you are not using my Homemade Pasta Sauce, you are seriously missing out on a lot! Click on the recipe link to take you there.
The first thing that I like to do is to spray my lasagna baking dish with some cooking spray. I find that it helps prevent the lasagna from sticking, especially the edges of the lasagna.
Ladle some sauce into the bottom of the pan. You don’t want a whole lot for the first layer, just enough to cover the bottom of the pan. top it with some gluten free lasagna noodles.
You can slightly overlap the lasagna noodles if you have to, but don’t overlap them too much. Look at the first picture I have to help you envision how the noodles should be laid out in the baking dish.
Layering
Divide the ricotta mixture into three equal parts.
Top the noodles with one part of the cheese mixture. You’ll want to use a rubber spatula with this step to help you spread it evenly across the noodles.
Try to apply gentle pressure because as you’ll notice, if you apply too much pressure, the lasagna sauce will ooze out from all directions.
If you find that the ricotta mixture is too stiff to spread, you can always add a splash of milk to help it become more spreadable.
Cover the ricotta spread with some of my Homemade pasta sauce. Enough to help the lasagna noodles continue their cooking process.
I personally like a lot of sauce, but if you like a dry lasagna, you can add less sauce, or just enough to help the noodles get al dente.
Top with another layer of lasagna noodles and repeat the layering process with the ricotta cheese mixture, sauce, and then noodles. Do this one more time. You want the last layer to be the noodles’ layer.
Cover the noodles with the Homemade Pasta Sauce . Sprinkle with some mozzarella cheese and some Parmesan cheese.
Baking the Lasagna
Get a piece of aluminum foil that is large enough to cover the baking dish.
Spray the shiny side of the aluminum foil with some baking spray. Cover the baking dish with the pre-sprayed aluminum foil shiny side down, and bake at 375 F for 30 minutes. Uncover and bake for an additional 15 to 20 minutes.
Let the lasagna rest for about 15 minutes before serving. Serve with some Mixed Green Berry Salad, and some gluten free garlic bread.
Get Your Gluten Free Cookbook Today!
Pin This Post!

More Gardening and Recipe Related Topics
Shop This Post
Tell Us What You Think!
Have you made lasagna before, or is this your first time making it? Was this post helpful to you?
Let us know if you have any comments or questions down in the comment section below.
Disclosure Policy
Disclosure: Some of the links in this post are “affiliate links”. This means if you click on a link and purchase the item, I will get an affiliate commission. It will not cost you any extra money, but it will help me pay for this website, and it will help me to keep providing you with helpful articles such as this one. I only post links to products that I personally use and love, or to products that I wish I could have, and that could be of value to you. The information that I provide you with, my blog, videos, and many resources are free.

Homemade Lasagna
Ingredients
Equipment
Method
- Preheat oven to 375 F
- Cook the gluten free Lasagna noodles according to package instructions. Rinse and drain very well. Place back into the pot and fill it with cold water. This will prevent the noodles from sticking and it will stop their cooking process.
- Into a mixing bowl, add all the cheese mixture ingredients. Mix well using a wooden spoon until all the ingredients are well combined.

- Spray a lasagna baking dish with some cooking spray.
- Ladle some of the Homemade Pasta Sauce onto the bottom of the baking dish enough to cover it.
- Place one layer of gluten free lasagna noodles over the sauce.
- Divide the ricotta cheese mixture into 3 equal parts. Spread one part over the layer of lasagna noodles. Cover with the Homemade pasta sauce enough to your liking. If you like more sauce, simply add more sauce. If not, simply reduce the amount of sauce you add to each layer.
- Add another layer of Lasagna noodle and repeat with ricotta cheese mixture, sauce, and then noodles. Repeat this layering one more time until you end up with noodles as your last layer.
- Cover the Last layer of noodles with the Homemade Pasta Sauce. Sprinkle the 1 cup of shredded mozzarella cheese and 2 tablespoons of parmesan cheese on top. Spray the shiny side of an aluminum foil sheet with some cooking spray and use it to cover the Lasagna dish. Bake for 30 minutes.
- Uncover and bake for an additional 15 to 20 minutes or until hot and bubbly and golden brown on the top.
- Allow it to cool for 10 to 15 minutes and serve with your favorite salad or side dish.
Video
Disclosure: Some of the links in this post are “affiliate links”. This means if you click on a link and purchase the item, I will get an affiliate commission. It will not cost you any extra money, but it will help me pay for this website, and it will help me to keep providing you with helpful articles such as this one. I only post links to products that I personally use and love, or to products that I wish I could have, and that could be of value to you. The information that I provide you with, my blog, videos, and many resources are free.


Be the first to reply