
Learn how to grow beans in this step-by-step guide. Planting beans is a relatively simple process, but it’s important to follow a few key steps to ensure successful germination and growth. Beans are a wonderful crop that adds nourishment to you and to your garden.
Disclosure: This post contains affiliate links. As an Amazon Associate I earn from qualifying purchases.
Choosing The Right Variety
There are many different types of beans, including bush beans, pole beans, and runner beans. Consider your available space and growing conditions when selecting a variety. Bush beans are compact and well-suited for small gardens or containers, while pole beans require trellises or supports to climb.
Choosing A Proper Location
Beans thrive in full sun, so choose a planting location that receives at least 6-8 hours of direct sunlight per day. Ensure the soil is well-draining and rich in organic matter.
What Type Of Soil Can Beans Grow In?
Soil PH
Beans prefer slightly acidic to neutral soil with a pH between 6.0 and 7.0.
Test the soil pH using a soil testing kit or by sending a sample to a local agricultural extension service. If the soil is too acidic, you can raise the pH by incorporating lime into the soil according to package instructions.
Soil Type
According to the the University of Minnesota, beans prefer a clay or silt loam soil. They do not like to dry out. This is why clay soil is ideal because it holds on to moisture. With that in mind, it is important not to overwater them because that can encourage fungal diseases.
Having a fertile well draining soil, with adequate moisture provided is the ideal soil for beans.
Mulch is a great way of preserving the soil moisture while suppressing weeds. Apply a layer of organic mulch such as straw, shredded leaves, or grass clippings around the base of the bean plants.
Mulching also helps in maintaining soil temperature, preventing soil erosion and it improves soil fertility as it breaks down.

How To Grow Beans
When Should You Start Beans Indoors
Beans prefer to be direct sown. They are fast growers, and typically have a short lifespan. Starting them indoors is unnecessary, unless you have a short growing season and you chose a variety that requires a long time to mature.
Another reason for starting beans indoors is soil moisture. If your spring season tends to be very wet, it is best to start bean seeds indoors. Too much moisture will cause the bean seeds to rot before they are able to germinate.
To start bean seeds indoors, sow them 2-4 weeks before the last frost date for warm weather varieties, and 2-4 weeks before temperatures are steadily in the 30’s at night and warm during the day for frost tolerant varieties.
You can learn more about starting seeds indoors here.
When Should Beans Be Planted
Most beans are warm-season crops that thrive in temperatures between 70°F and 85°F (21°C to 29°C). Wait until all danger of frost has passed and the soil temperature has warmed to at least 50°F (10°C) before planting beans outdoors.
In cooler climates, you can start beans indoors 2-3 weeks before the last frost date and transplant them outdoors once the soil has warmed.
Frost Tolerant beans can be planted as soon as ground is workable. They can also be started indoors and transplanted outdoors for a speedier germination.
This post contains affiliate links, which means I make a small commission at no extra cost to you. As an amazon affiliate, I earn from qualifying purchases.
Hardening Off
If you have started your beans indoors, it is important to acclimate them to the outdoor weather before planting. This process is known as hardening off.
To harden off bean plants, place them outdoors, in a sheltered location for 2 to 3 hours on the first day. Gradually increase the time outdoors and sun exposure by 1-2 hours each day until plants are well acclimated to the outside weather.
Once plants are well acclimated, leave them outdoors for a couple of nights before planting in your chosen location. If frost is expected, provide them with a frost protection using a frost cover.

Planting
Before planting, prepare the soil by loosening it to a depth of 6-8 inches and removing any weeds or debris. Incorporate compost or well-aged manure to improve soil fertility and structure.
Plant bean seeds directly into the garden after the danger of frost has passed and the soil has warmed to at least 50°F (10°C). (Fava beans are a variety of beans that prefer cooler weather, can handle a light frost, and can be sown in early spring.)
Plant seeds 1-2 inches deep and space them according to the recommendations for your chosen variety. Bush beans typically require 3-6 inches between plants, while pole beans may need 4-6 inches between plants and 3-6 feet between rows. Pole beans should be provided with a trellis to climb on.
Fertilization
Beans are relatively low-maintenance and don’t require heavy fertilization. However, you can side-dress the plants with a balanced fertilizer once or twice during the growing season if growth appears slow or leaves show signs of nutrient deficiencies.
Keep the bean bed free of weeds that compete for nutrients, water, and sunlight. Regularly cultivate the soil around the bean plants to remove weeds, being careful not to disturb the roots.
How Do I Know When Beans Are Ready To Pick?
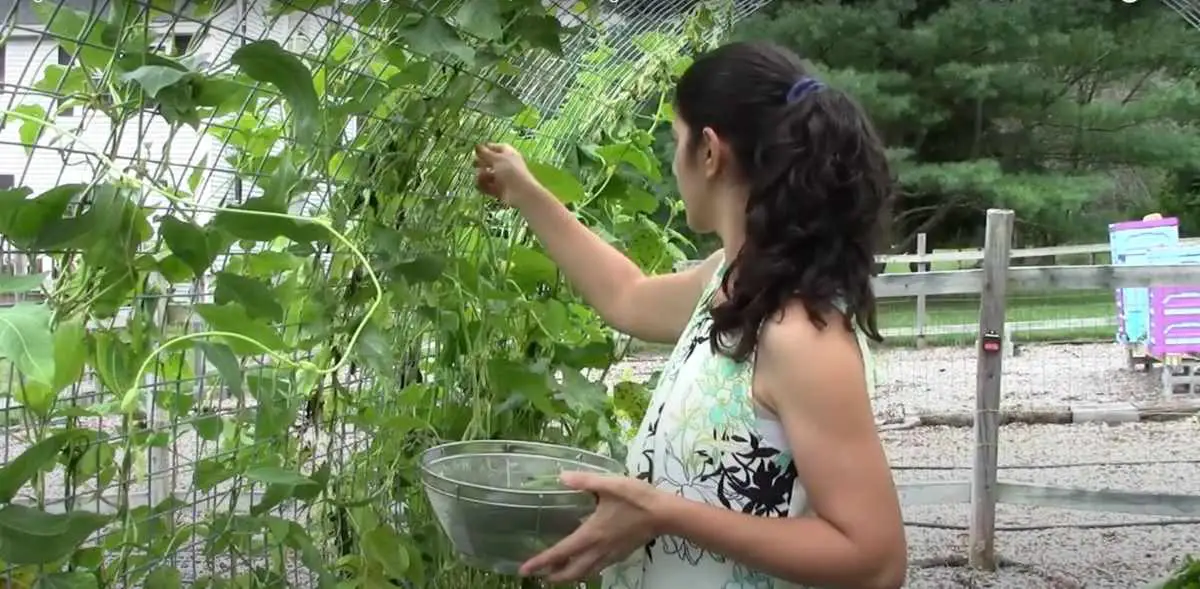
Beans are typically ready for harvest within 50-70 days after planting, depending on the variety. Beans that are ready to be harvested should snap easily off the plant.
Harvest Snap beans when they are young and tender, before the seeds are fully mature, for the best flavor and texture.
Shelling beans should be harvested once the seeds are plump and you can clearly see their form in the pod.
Pick beans frequently to encourage continued production and prevent them from becoming overripe and tough.

How Do You Get Seeds From Beans?
If you want to save seeds for future plantings or store dried beans, allow some of the beans to fully mature and dry on the vine. Fully mature beans should turn yellow and begin to dry. Harvest the dried pods, shell the beans, and store them in a cool, dry place until you’re ready to plant them next season.
If you live in a humid environment, allowing the bean seeds to dry on the plant might be problematic. Too much moisture will cause the beans to rot. To prevent this, allow the beans to fully ripen, turn yellow with mature seeds, on the plant.
Once the beans have fully matured, harvest and place on a cooling rack, or something that will allow the air to circulate around the beans. Beans should be placed in a warm dry location to fully dry. Placing a gentle fan, facing the beans, to circulate the air will speed up the drying process.
Once the beans have fully dried, shell and store in a cool, dry place.
Companion Planting
Beans can benefit from companion planting with certain vegetables and herbs that help repel pests, attract beneficial insects, or improve soil fertility. Consider planting beans alongside compatible companions such as carrots, cucumbers, radishes, or herbs like basil and dill to maximize garden productivity and diversity.
By considering these factors when selecting a location for planting beans, you can create an optimal growing environment that promotes healthy, productive bean plants and ensures a successful harvest.
Methods Of Preserving Beans
Preserving beans allows you to enjoy their freshness and flavor long after the growing season has ended. Here’s an expanded guide on how to preserve beans using various methods:
Freezing
- Snap Beans: Snap beans can be blanched and frozen to preserve their texture and flavor.
To freeze snap beans, start by washing and trimming the ends of the beans. Blanch them in boiling water for 2-3 minutes, then immediately transfer them to an ice water bath to stop the cooking process.
Drain the beans and pat them dry, then pack them into freezer-safe bags or containers. Label the bags with the date and store them in the freezer for up to 12 months. - Shell Beans: Shell beans can also be blanched and frozen for later use. Shell the beans and blanch them in boiling water for 2-3 minutes, then transfer them to an ice water bath to cool.
Drain and pat the beans dry, then pack them into freezer bags or containers. Label and freeze the beans for up to 12 months.

Freeze Drying
Freeze drying is one of the simplest and easiest methods of preserving food. Both Snap beans and shell beans are fairly easy to freeze dry. Simply wash and dry snap peas, place them on the freeze drier tray and follow the freeze drier directions to starting a the freeze drying process.
Store freeze dried beans in a mylar bag, or glass jar. Place an oxygen absorber, and silica gel packets inside the container of your choice.
Canning
- Pressure Canning: Dry beans can be pressure canned for long-term storage.
Start by sorting and rinsing the beans, then soaking them overnight in water. Drain the beans and pack them into clean, sterilized canning jars, leaving 1 inch of headspace.
Cover the beans with boiling water, add salt if desired, and remove any air bubbles. Wipe the jar rims clean, apply lids and bands, and process the jars in a pressure canner according to the recommended time and pressure for your altitude. - Water Bath Canning: Snap beans can be canned using a water bath canner.
Wash and trim the beans, then pack them into clean, sterilized canning jars.
Cover the beans with boiling water, add salt if desired, and remove any air bubbles. Wipe the jar rims clean, apply lids and bands, and process the jars in a boiling water bath for the recommended time based on your altitude.
Drying
- Dry Beans: Dry beans can be dried for long-term storage.
Start by shelling the beans and laying them out in a single layer on a clean, dry surface. Allow the beans to air dry completely, then transfer them to a well-ventilated area to finish drying.
Once fully dry, store the beans in airtight containers in a cool, dark place for up to one year. - Snap Beans: Snap beans can also be dried for later use.
Wash and trim the beans, then blanch them in boiling water for 2-3 minutes. Drain and pat the beans dry, then spread them out in a single layer on dehydrator trays.
Dry the beans in a dehydrator at 125°F (52°C) until crisp and brittle. Store the dried beans in airtight containers in a cool, dark place for up to one year.
Pickling
Snap beans can be pickled to preserve their crunch and flavor.
Wash and trim the beans, then pack them into clean, sterilized canning jars along with garlic, dill, and other desired seasonings. In a saucepan, combine vinegar, water, salt, and sugar, and bring the mixture to a boil.
Pour the hot brine over the beans in the jars, leaving 1/2 inch of headspace. Wipe the jar rims clean, apply lids and bands, and process the jars in a boiling water bath for the recommended time based on your altitude.
Fermenting
Snap beans can be fermented to preserve them and develop complex flavors.
Wash and trim the beans, then pack them into clean, sterilized jars along with garlic, herbs, and spices. Prepare a brine solution by dissolving salt in water, then pour the brine over the beans in the jars, making sure they are fully submerged.
Place a weight on top of the beans to keep them submerged, then cover the jars with lids or fermentation weights. Allow the beans to ferment at room temperature for several days to several weeks, depending on desired taste. Once fermented, store the jars in the refrigerator for long-term storage.
By using these preservation methods, you can enjoy fresh, flavorful beans year-round and reduce food waste by making the most of your harvest. Experiment with different preservation techniques and recipes to find your favorite ways to enjoy preserved beans.
Pin This Post!

More Gardening and Recipe Related Topics
Gardening
Recipes
Shop This Post
Tell Us What You Think!
By following these growing guidelines, you can ensure a bountiful harvest of fresh, flavorful beans and enjoy them at their peak quality. Harvest beans regularly to encourage continued production throughout the growing season. And don’t forget to checkout our bean recipes!
Is this your first time growing beans? Let us know if you have any comments or questions down in the comment section below.

Be the first to reply