
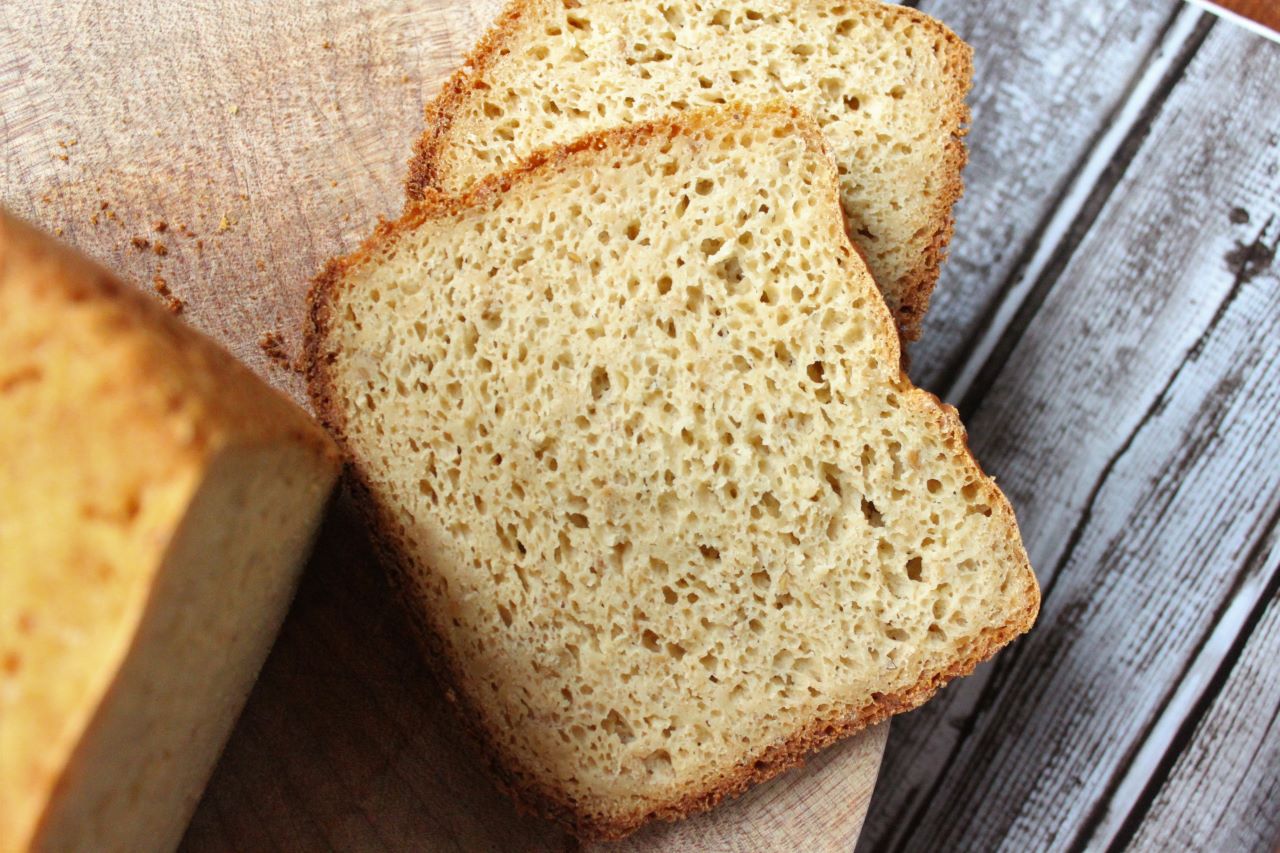
This gluten free bread recipe can be made in both bread machine, and in the oven. It is super simple and easy to make. It uses Chanta’s All-Purpose Gluten Free Flour Blend. It is great for sandwiches, and can be frozen for later use.
Jump to RecipeI remember how hard it was to find gluten-free bread in the store. When I did find it, I thought it tasted like dirt, and I had to drink a gulp of water with every bite because it was too dry. I will admit, however, it has come a long way, but it is way too expensive. That’s why I created this recipe. This bread is much cheaper, more delicious, moister, and does not crumble before it gets in your mouth.
INGREDIENTS FOR THIS GLUTEN FREE BREAD RECIPE
Wet Mix
- Lukewarm water or milk. I mostly use water or unsweetened almond milk.
- Olive oil You have to think of gluten free bread as a cake. It does not have the texture of a cake, but the batter of a cake, only slightly thicker. The oil is important to help the bread stay moist.
- Honey for both flavor and as food for the yeast to help in rising the bread.
- Active dry yeast to help in rising the bread and giving it that yeasty flavor.
- Apple cider vinegar or lemon juice to help in braking down the starches and proteins in the bread. It also helps in rising the bread and enhancing it’s flavor.
- Eggs, or flaxseed powder as a replacement to act as a binder before and during the baking process. 1 tablespoons of flaxseed powder plus 3 tablespoons water is equivalent to 1 egg.
Dry Mix
- Chantal’s All-Purpose Gluten Free Flour Blend
- Rolled oats. You can totally omit that if you want to, but I find that oats add a great flavor to the bread.
- Xanthan gum to act as a binder.
- Baking powder to help in rising the bread. even though we are adding yeast, this is a quick bread. So the baking powder is going to speed up the rising process, and help the bread in achieving a higher rise.
- Salt for flavor.
- Toasted sesame seeds or organic whole sesame seeds (optional) for both flavor and texture.
- Flax seeds (optional) for both flavor and texture.
NEEDED UTENSILS
- Stand up Mixer or hand mixer
- Large spoon
- Large bowl
- Measuring cups
- Measuring spoons
- A butter knife to level the flour in the measuring cup.
- Spatula
- Baking spray
- 9 x 5 loaf pan, preferably nonstick, or bread machine
- Foil
- Cooling rack
TWO WAYS TO MAKE THIS BREAD
There are two ways to make this bread. They are both quick and simple.
The first technique which has become personally my favorite, is using the bread machine. The second is using an oven.
HOW TO MAKE GLUTEN FREE BREAD USING A BREAD MACHINE
We will not be using the bread machine to mix the bread, but simply to allow it to rise, and to bake it. It’s a team work, you see.
The first thing you’ll need to do is to allow the yeast to proof. I personally skip this step all together because yeast does not last long in my fridge because it is constantly being used; but if you are not sure whether your yeast is alive or not, then this is an important step that should not be missed.
We will proof the yeast directly into the bowl of a standup mixer. This will simply make things a lot easier for us.
Proofing the Yeast
So into a standup mixer bowl, add in the honey, water, and yeast. Mix everything until the honey is dissolved. The honey will be the food which the yeast will feed on. Cover the bowl, and allow it to sit for 10 minutes in a warm environment.
If the yeast is alive, the surface of the mixture should begin to look frothy in about 10 minutes.
Once you have proofed the yeast, add in the rest of the wet ingredients into the bowl of the standup mixer. Gently mix everything together until well combined.
Adding the Dry Ingredients
Now that the wet mixture is ready, it is time to begin adding in the dry ingredients.
Add in the flour, rolled oats, xanthan gum, salt, baking powder, sesame seeds, and flax seeds. Mix on low until the dry ingredients are somewhat combined, then begin to mix on high for 10 minutes.
Why mix on high for 10 minutes?
The reason why I love to do this, is to incorporate as much air as I can into the batter. The dough feels dense. This density prevents the carbon dioxide that is produced from the yeast and baking powder to expand the batter as much as it can. So we are simply helping the baking powder and yeast by creating air pockets for them to freely expand in.
From experience, I see that this technique of prolonged mixing has definitely helped the rising and texture of the bread.
In previous times, I used to mix the batter for 3 minutes only, but now I see that 10 minutes of mixing is definitely a big help.
What should you do if you do not have a standup mixer or a hand mixer? Mix as best as you can, and bake the bread.
would it give you the same results? no, it will not, but it will still be great, and it will taste just as good.
Why Use Both Yeast and Baking Powder?
In gluten free products, yeast alone is not sufficient to allow the batters to rise to their maximum capabilities. however, baking powder has the full capability of doing so. Why use yeast then?
Yeast does not only aid in rising the bread, but it will also give the bread a different texture, and a yeast flavor which will trigger your brain to believe that it is eating bread not cake. The texture of gluten free bread is completely different than gluten bread. The smell would be cake like rather than bread without the yeast. Therefore, it is necessary to add in yeast.
After you have mixed the bread, remove the mixing mechanism from the bread machine bowl. You will not need this, and in fact it will ruin the bread if you leave it in there.
Baking the Gluten Free Bread in a Bread Machine
Place the prepared batter into the bread machine bowl and level it using a spatula.
I do not know what type of bread machine you have, or what settings it has, but I will share with you the settings for my bread machine.
On my bread machine, I have settings for white bread and whole wheat bread, cakes, quick breads, and jellies.
The settings for white bread include, small loaf, medium loaf, and large loaf (which is 2.5 pounds)
I have found that setting the bread machine on white large loaf is the best for baking the bread. The bread rises well, it comes out properly baked. Not overbaked, not under baked, just right, and most important of all, it tastes amazing.
The main thing is to make sure to remove the mixing attachment as it will deflate the bread, and it will not be able to rise again to its maximum potential.
If you have a gluten free bread setting, you might want to use that instead, but I have an old machine, and that seems to work.
Cooling the Bread
After the bread is done baking, remove it from the bread machine, and allow it to cool on a wooden cutting board. I prefer this method as it will not end up with a soggy bottom, and it will not release all of its moisture in the process of cooling off.
HOW TO MAKE GLUTEN FREE BREAD IN AN OVEN
The first process of mixing the bread stays the same. The only difference is in the baking technique.
Preheat the oven to 375 F
The Rising Process
Spray a 9×5 bread pan with non stick cooking spray, or coat it with butter. Place the bread batter into the loaf pan, and level using a spatula.
Allow the bread to rise for 20 minutes until it is just above the edge of the pan.
The Baking Process
Bake on the center rack for 30 minutes. Cover it with foil, and bake for 15 more minutes to prevent the top of the bread from burning.
Insert a toothpick into the bread to make sure it is done. If the tooth pick comes out clean, the bread is done. If you end up with a few crumbs on the tooth pick, turn off the oven, and leave the bread in the oven for 10 more minutes.
Cooling the Gluten Free Bread Without Deflating it
Place the bread on its side while it is still in the pan to prevent it from deflating. Switch sides 15 minutes later. After this remove the bread from the pan and place it on a wooden cutting board. allow it to cool completely before slicing.
Slicing and Storage
It is important to allow the bread to cool completely before slicing in order to trap as much moisture as possible in the bread. If you slice into the bread when it is not completely cooled, the bread will become either supper dry, or supper soggy depending on how hot it was when you sliced it.
It is best to store the bread in the a plastic storage bag in the fridge without slicing it. Slice as much as you need of the bread when you need it. This will prevent it from drying and having a crumbly texture.

LOOKING FOR MORE GLUTEN FREE RECIPES? CHECK THESE OUT!
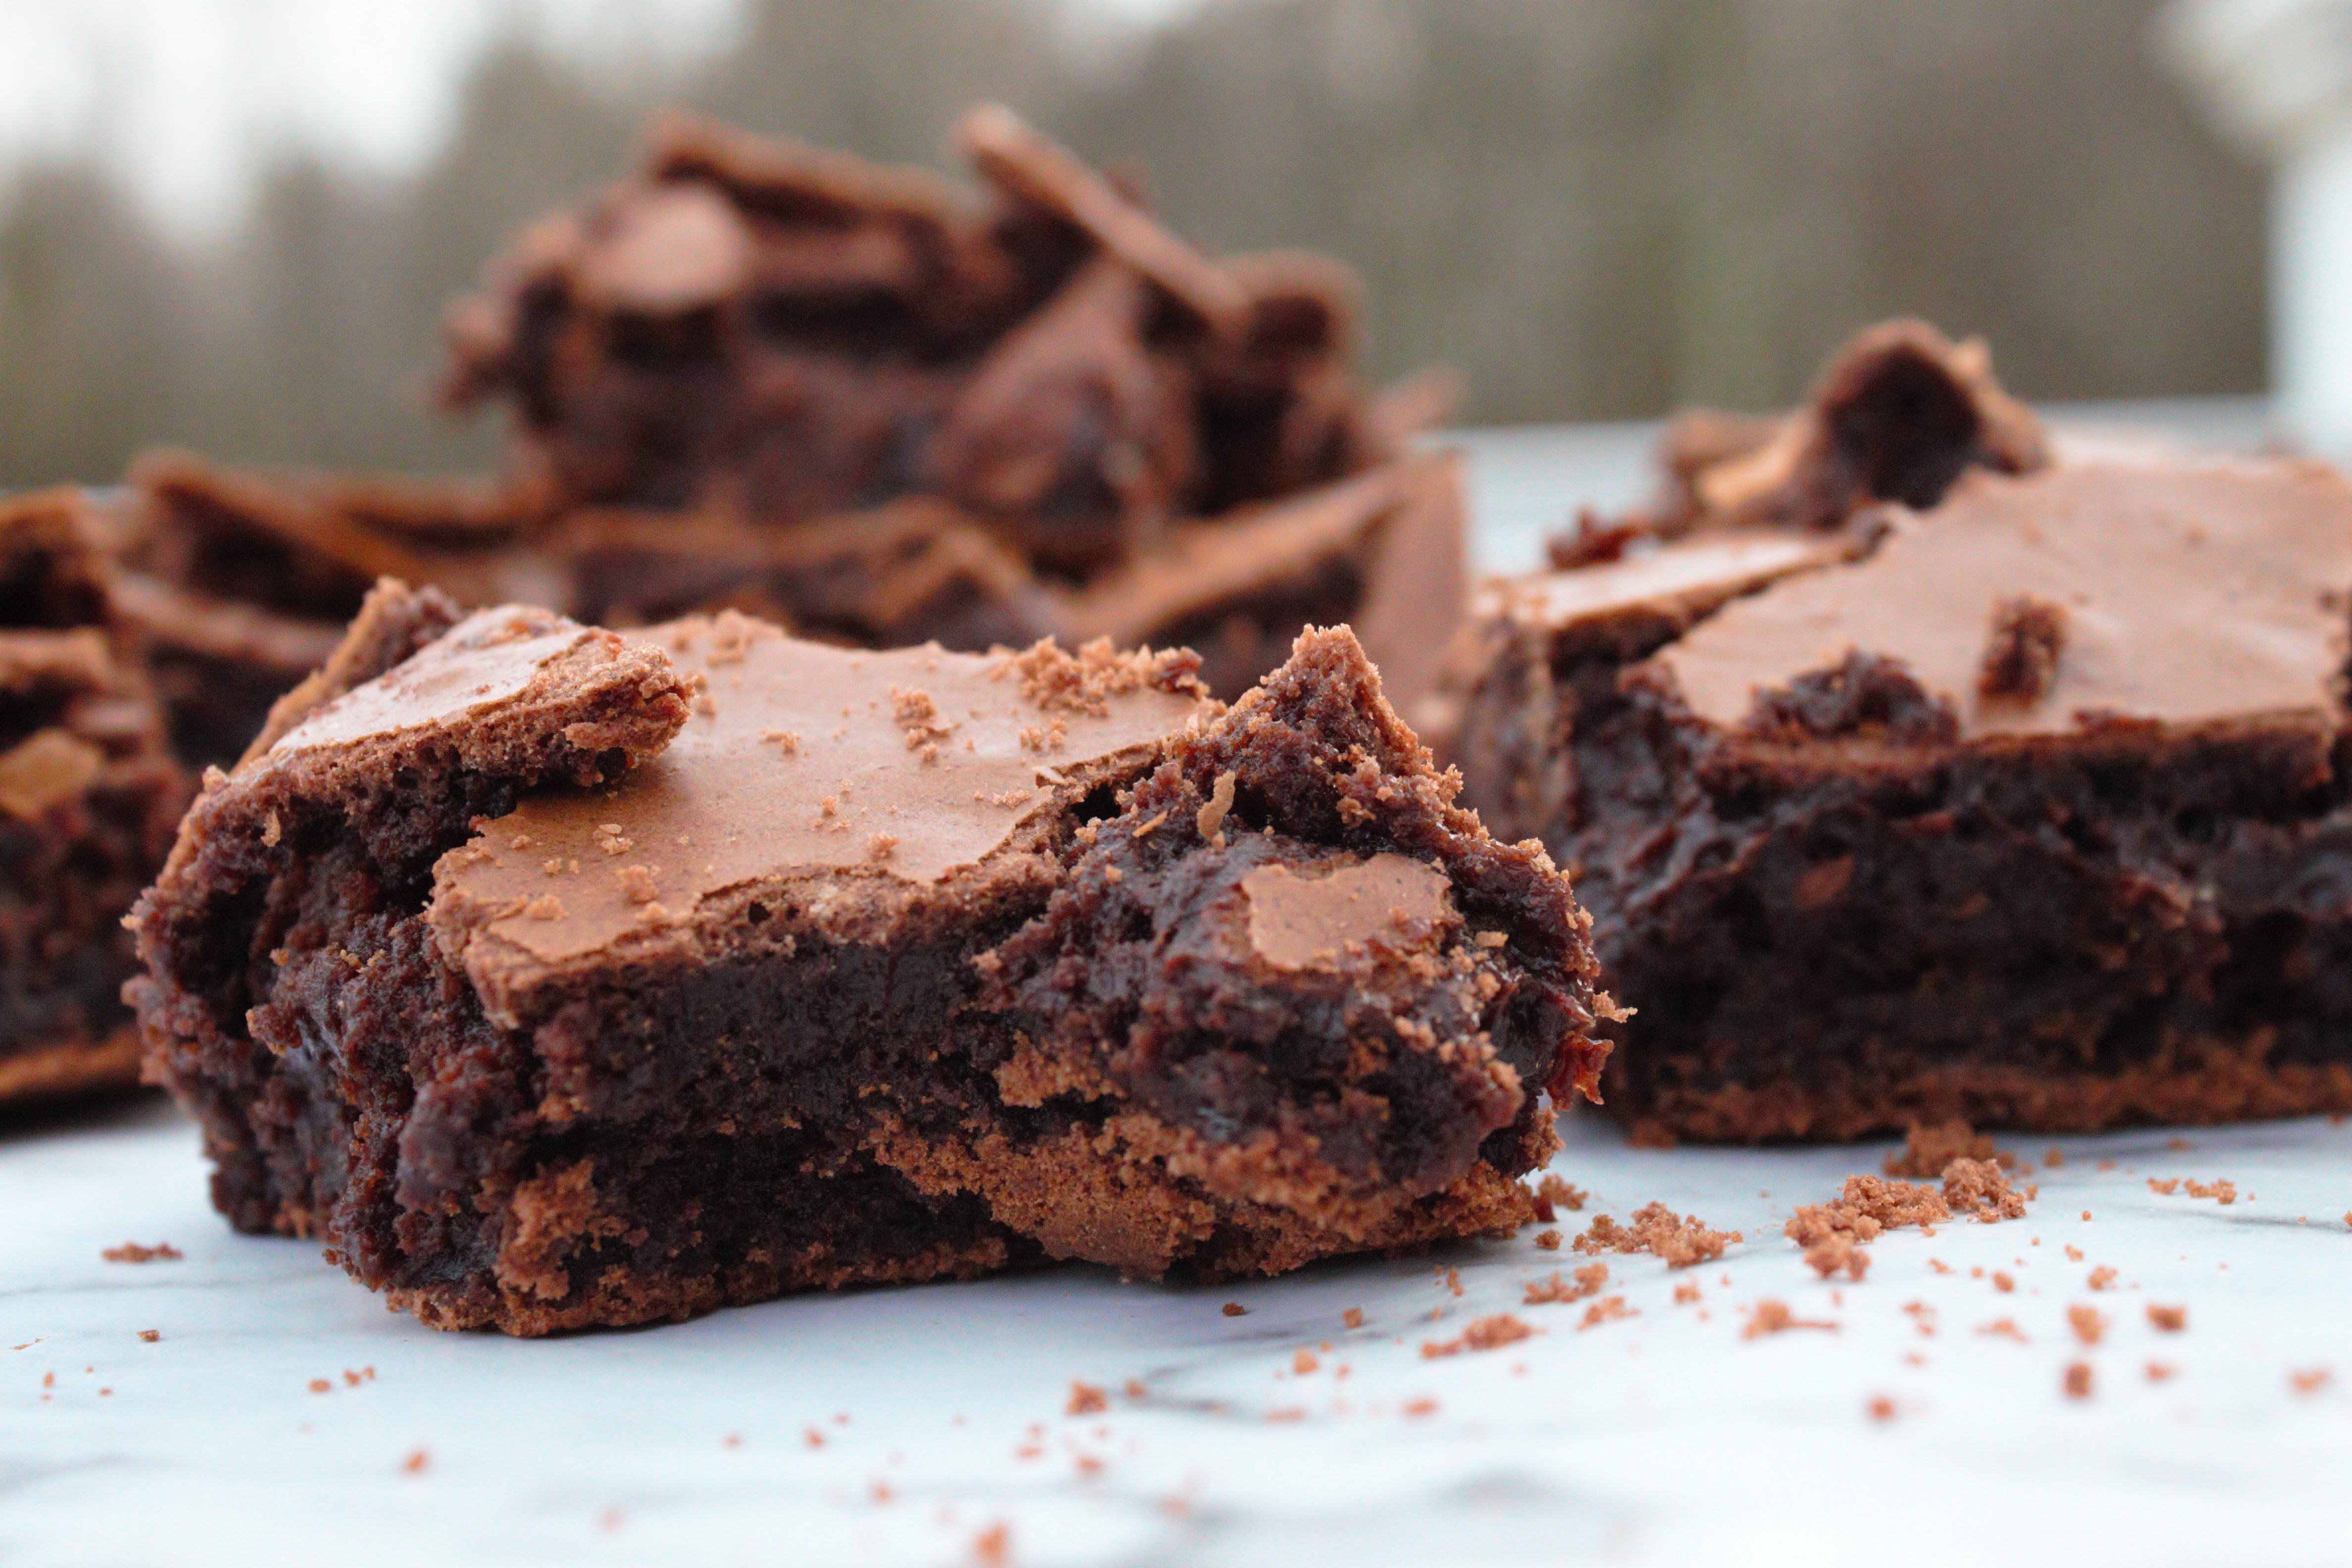
Gluten Free Brownie Recipe – Fudge Brownies
Gluten Free Vanilla Cake Mediterranean
Soft And Fluffy Vegan Gluten Free Burger Buns
Vegan And Nut Free Gluten Free Soft Pretzels

Sandwich Bread
Ingredients
Equipment
Method
- In the bowl of a standup mixer, mix all the wet ingredients together until well combined.
- Allow yeast to proof for 10 minutes or until you begin to see foam on the surface of the wet mixture
- Add the dry ingredients to the wet mixture and start mixing on low until the ingredients are somewhat combined.
- Mix everything on high for 10 minutes. You will start to see the dough thickening as you continue to mix.
- Oil your loaf pan. Using a spatula, scrape the bread mixture into the prepared loaf pan.
- Level the mixture using the spatula.
- Preheat oven to 375 F
- Allow bread to rise for 20 minutes at room temperature while the oven is preheating. Do not over proof your bread because the baking powder will lose its ability to raise the bread after many minutes of just sitting there in the bread mixture without being baked since it is a chemical reaction that creates the air bubbles when using baking powder. Also, it is important to note that you do not allow the bread to rise above the loaf pan because gluten-free bread has no structure and it will drip down the sides as it continues to rise.
- Bake the bread for 30 minutes.
- After 30 minutes have passed, cover the top of the bread with a piece of aluminum foil, and let it bake for an extra 15 minutes.
- After the 15 minutes are over, insert a toothpick into the bread. If you still see crumbs on the toothpick, or if the bread still feels a bit jiggly, cover it again. Turn OFF the oven, and let it sit there in the turned-off hot oven for an extra 10 minutes.
- Remove the bread from the oven, and turn it on its side while it is still in the pan for 15 minutes.
- After the 15 minutes are over, turn it again on its other side for 15 minutes.
- These two last steps will prevent the bread from collapsing on itself as it cools down slowly.
- Remove the bread from the loaf pan, and set it on a wooden cutting board to cool completely.
- Store in a zip lock bag in the fridge. Do not pre-slice the bread as this tends to dry it out and it will crumble up into little pieces as you try to make a sandwich out of it. It is best to slice it when you are ready to make a sandwich.
- Follow the same steps to prepare and mix the bread batter.
- Remove Kneading hook from bread machine insert. Transfer the bread batter into your bread machine insert.
- Place the bread into your bread machine insert. The setting that I use on my bread machine is white bread, 2.5 pounds or large. Close the lid, walk away, and let it do its thing.
- Allow the bread to cool onto a wooden board before slicing.
Notes
Disclosure: Some of the links in this post are “affiliate links”. This means if you click on a link and purchase the item, I will get an affiliate commission. It will not cost you any extra money, but it will help me pay for this website, and it will help me to keep providing you with helpful articles such as this one. I only post links to products that I personally use and love, or to products that I wish I could have, and that could be of value to you. The information that I provide you with, my blog, videos, and many resources are free.
I love the flavor of this bread! I used the white bread program but my bread machine only goes up to 2 lb loaf size so the texture seemed undercooked. Should I bake longer or add a little more flour blend?
I would try baking it a little longer. I think adding more flour would dry it out a bit too much. I hope this helps <3
Yes, cooking longer was my first thought but wasn’t sure. I keep trying. Thanks for your response!
You are very welcome 🙂