

Kimchi is one of the most popular foods in Korean cuisine, but it is also popular at my house. It is rich in probiotics which are essential to our gut health.
Ingredients for Making Kimchi
- 3 pounds Napa Cabbage
- 1/3 cup kosher salt
- Small piece of ginger about the size of a teaspoon
- 1 Large head of garlic (about 10 cloves)
- ½ a medium onion (largely diced)
- 1 ½ tablespoon sweet white rice flour
- 1 ¼ cup water
- 1 tablespoon brown sugar
- ¼ cup fish sauce or soy sauce if you want to make it vegetarian
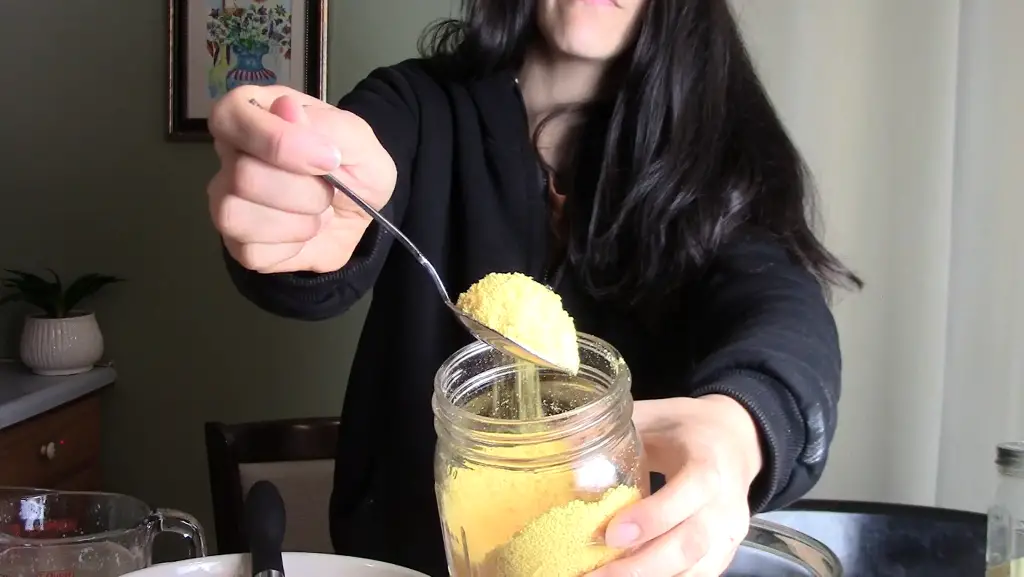
- ¾ cups or (¼ and 1/8 cup) Korean Hot pepper flakes (If you want it less spicy use the ¼ and 1/8 cup measurements instead. I usually use this amount as it makes it less spicy so my kids can enjoy it better)
- ½ of a large daikon radish sliced into thin strips about 2 inches in length
- 1/3 cup roughly chopped parsley
- 1 cucumber (julienned)
- 1 small carrot (peeled and julienned)
- 1 bunch of green onions sliced into 1-inch slices
- Small bunch of chives (if available) chopped into 1-inch slices
Utensils
- Food processor
- Sharp large knife
- Chopping board
- Large bowl
- Measuring cups
- Measuring spoons
- Medium pot
- Wooden spoon
- Glass fermentation Jars
- Glass weights
How to use Kimchi
Kimchi is used in a variety of Korean dishes, but my favorite way to use it is in its raw form. In this form, it provides you with its highest amount of nutrients.
I have tried it in several other Korean dishes, and it is delicious whether cooked or raw. If you haven’t guessed yet, I am a big fan of Korean food, and all types of Asian foods.
This recipe was inspired by my all time favorite Korean cook Maangchi. I took the liberty to tweak it to my liking. If you want the original recipe, you could visit her YouTube channel, or her blog.
You can use it as a side dish to many other dishes such as grilled meats, rice, soups, and more.
What Vegetables Can Be Added to Kimchi
Since this is a fermented food, I am constantly trying to add new things to this recipe to see how well they play out together.
This past time I made it, I pureed a ripe pear along with the ginger, garlic, and onions. It turned out okay, but I believe that I prefer it without the pear.

Feel free to adjust the amounts of vegetables that are added to this recipe, or to add new vegetables to it.
However, you probably should not add tomatoes to it as it can change the flavor quite drastically.
There is such a thing as tomato kimchi though. The ingredients are not that much different from this recipe except you do not add the cabbage.
Salting the Cabbage
Salting the cabbage is an essential part of the recipe and you cannot skip it.
Yes, it is time consuming, but it does not require that much work on your part.
All that is required of you once it is salted is to give it a quick toss every 30 minutes to ensure that all sides are being salted equally.
The salt plays Three rolls in here.
The first thing it does is to help draw out the moisture out of the cabbage which gives it a crispier texture after it has been fermented.
The drawing out of the water aids in allowing the seasonings to penetrate the cabbage leaves and gives it a uniform flavor.
And the last and most important aspect is that it plays a huge role in preserving the fermented kimchi.
How to Know If Your Kimchi Went Bad
Make sure to practice food safety, and if you notice any mold or an awful smell, throw the kimchi away.
Kimchi does have a pungent smell, but if it is well fermented, it should smell sour as well. If it smells like rotten eggs or rotten meat, then you should throw it away.
I never had that problem myself, but you never know what could happen or what could have caused it to happen.
If you encounter this problem during your kimchi expedition, just throw it away, and try again.
Get Your Free Gluten-Free eBook Cookbook Today!
Pin This Post!

More Gardening and Recipe Related Topics
How To Make Gluten Free Sourdough Starter
Shop This Post
Chopping board
Glass fermentation Jars
Glass weights
Tell Us What You Think!
Homemade Kimchi is a wonderful fermented food. You can change the flavor of this ferment, add or remove any vegetable from it. Some people also choose to add fermented shrimp or anchovies to their kimchi.
Fermented foods are a great addition to our diets. They improve our gut health, and they have so many other health benefits.
Have you made kimchi before? Is this your first time making it? Tell us what you think?
What do you like eating kimchi with? Or how do you like to cook it?
If you have any questions or comments, please leave them in the comment section below.
Disclosure Policy
Disclosure: Some of the links in this post are “affiliate links”. This means if you click on a link and purchase the item, I will get an affiliate commission. It will not cost you any extra money, but it will help me pay for this website, and it will help me to keep providing you with helpful articles such as this one. I only post links to products that I personally use and love, or to products that I wish I could have, and that could be of value to you. The information that I provide you with, my blog, videos, and many resources are free.

Easy Kimchi Recipe
Ingredients
Equipment
Method
- Slice the cabbage head in half. Slice each half again in the middle. Get rid of any tough stalks, but makes sure you still have enough stalk to hold the cabbage leaves together.
- Fill a large bowl with cold water. Dunk the sliced cabbage into the cold water, and drain.
- Sprinkle a little bit of kosher salt in between each leaf. Place the salted cabbage in a large bowl. Let it rest for 2 to 3 hours flipping it every 30 minutes. This will allow all the leaves to get salted. This process will allow the leaves to stay crunchy after they have been fermented.
- Meanwhile, we will prepare the “dressing” that goes on the cabbage. Place the water and sweet white rice flour into a medium pot over medium heat stirring constantly to prevent clumping. Once the rice mixture has reached the boiling point, add in the brown sugar and stir for 2 more minutes. Remove from heat, and let it cool.
- In the meantime, while the rice mixture is cooling, and the cabbage is being salted, we can work on our vegetables. If you haven’t sliced your vegetables yet, now is the time to rinse and slice them according to what is stated in the ingredient list.
- Place the diced onions, garlic and ginger into a food processor and process until smooth.
- Once the rice mixture has completely cooled, add in the processed vegetable mixture, fish sauce (or soy sauce), Korean red pepper flakes, and the diced vegetables. Mix until everything is well combined.
- After the cabbage has finished being salted for the required time, fill a large bowl with cold water, and rinse the sliced cabbage several times. Let it drain.
- Now for the fun part, you might want to wear some plastic food gloves for this part. I personally don’t, but if you are not used to handling spicy food, you might need to wear those gloves.
- Place a little bit of the rice and vegetable mixture between each of the cabbage leaves making sure to entirely cover every cabbage leaf with this delicious mixture.
- Place the dressed cabbage into a large glass jar and pack tightly making sure to have the excess liquid rise at the top of the cabbage to prevent spoilage. Place a clean glass weight over the cabbage. Loosely cover the jar with a lid, or if you have a fermentation lid, you can use that too. The objective is to allow the gases being produced during the fermentation process to escape the jar. Place the jar on the counter out of direct sunlight and let it ferment for 3 to 7 days.
- Make sure to check on the ferment once a day. Remove the lid, and press the cabbage leaves down to allow more of the ferment liquid to escape to the top, and prevent any air bubbles that might be stuck in between the leaves.
- You will know whether your ferment is done or not by the smell and the amount of air bubbles that is being produced at the top. If the ferment smells sour, and you notice a lot of bubbles when you press the cabbage leaves down, then your ferment is ready. At this point, all you need to do is to tightly seal the jar and place it in the fridge. The ferment should be good for several months.
Notes
Disclosure: Some of the links in this post are “affiliate links”. This means if you click on a link and purchase the item, I will get an affiliate commission. It will not cost you any extra money, but it will help me pay for this website, and it will help me to keep providing you with helpful articles such as this one. I only post links to products that I personally use and love, or to products that I wish I could have, and that could be of value to you. The information that I provide you with, my blog, videos, and many resources are free.

Be the first to reply