
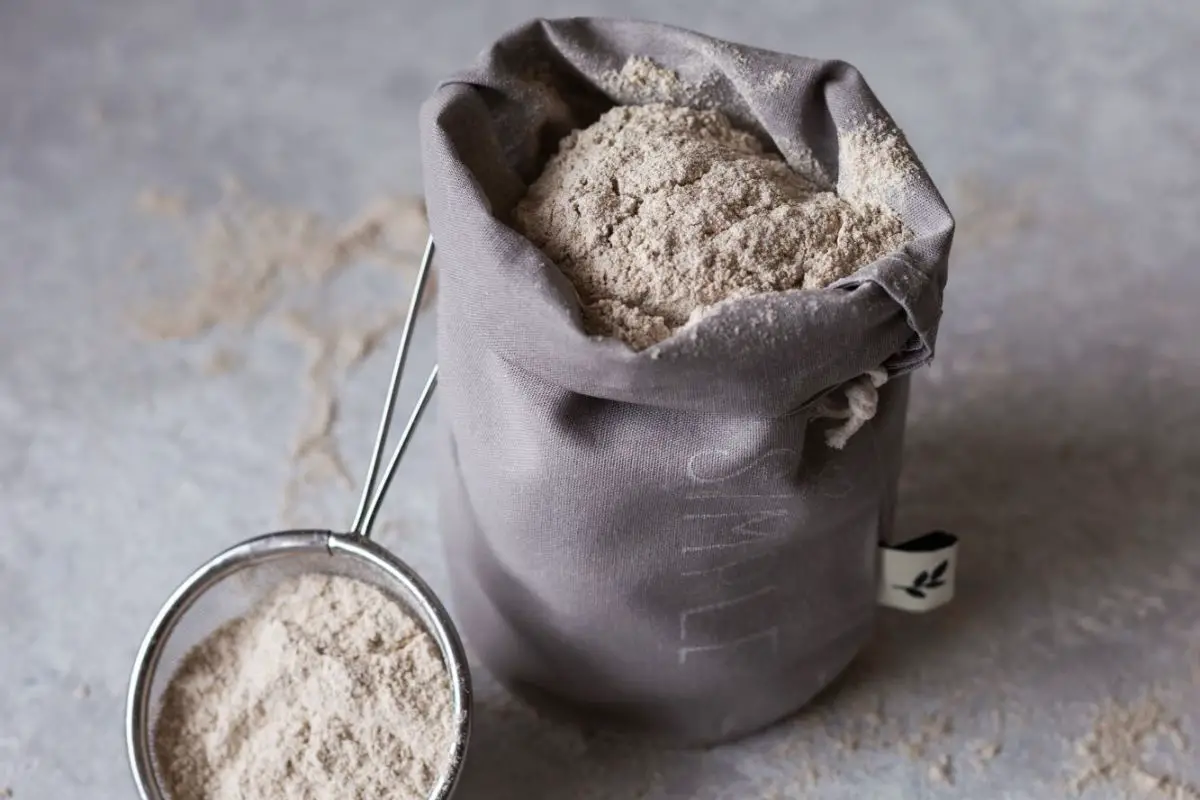
Learn how to make rice flour at home using three different methods. Rice flour is such a versatile and vital element in gluten free baking. It is one of the essential additives to gluten free baking mixes. It can also be used on its own in various recipes. You can follow my Flat Rice Bread Recipe, to make your own rice bread. Making rice flour is super simple if you have the right tools on hand.
Why is My White Rice Flour Sticky
From my observation and baking experience with rice flour, it can vary in texture and quality from one supplier to another.
Not to throw anyone under the bus here, but without mentioning any names, some white rice flour from certain suppliers behaves completely differently than what my experience tells me how rice flour should behave.
It seems to me that certain white rice flour coming from certain suppliers can behave more like SWEET white rice flour and not the regular white rice flour.
Those are two completely different types of flour, and they each have their uses, but they can not be interchanged. Finding the right rice flour can be frustrating.
Where Can I Find Good Rice Flour
I do love Anthony’s gluten free products, but to my knowledge, at the time that I am writing this post, they do not offer white rice flour, but they do offer brown rice flour.
I use their flour all the time. Once I discovered them I never went back to what I used to buy. I seriously believe that they have the best products out there. But, unfortunately, as I said before they do not offer white rice flour.
You can use my affiliate link if you would like to try their products.
No problem though, You came here to know how to make rice flour, and that’s what I will be sharing with you.
How to Make Rice Flour YouTube Video
For more videos like these, head on over to my YouTube Channel and hit that subscribe button!
Choosing the Right Type of Rice
There are different types of rice out there. Long grain, medium grain, short grain, jasmin, basmati, wild rice, black rice, and so on and so forth. So how do you know which type of rice gives you the type of rice flour that you are looking for?
It is pretty simple from the way I look at it. The longer the grain of rice the less sticky it is. The shorter the grain of rice, the more sticky it is.
the question that lies here is not just which type of rice should I use to make rice flour, but also in what application am I going to use this rice flour.
If you were going to use it in something like thickening stews, or making rice cakes, or a Korean rice cake, you will need what is known as sweet rice flour.
As I mentioned before, the shorter the grain, the stickier the rice is. So if you want to make sweet rice flour, you will need to use a short grain rice to achieve that.
Now what if you were going to make my Flat Rice Bread, Which rice should you use? I would suggest using a long grain rice.
Difference Between Brown Rice Flour and White Rice Flour
The same rules apply to brown rice flour, if this is what you were choosing to make.
White rice is brown rice with the bran and germ removed. These two elements (Bran and germ) are what gives the rice its brown color.
They are also what holds most of the vitamins and minerals. So if you you are going for a “healthier” type of rice flour, you could choose to use brown rice instead.
How to Tell If Rice is Gluten Free
Naturally, all rice is gluten free. However, some rice can be cross contaminated with wheat or barley if they were all processed in the same factory, or if the same exact machines that were used in harvesting the wheat and barley where also used on the rice.
We would hope that all companies would state on their bags if their rice was produced in an allergen free environment or not. But that is not always the case.
If you want to know more information about a specific product, you can visit that specific rice company’s website, and hopefully they would have more information about their products whether they are celiac safe or not.
You can visit Beyond Celiac .org to learn more about how to choose your rice safely.
How to Make Rice Flour
As I have mentioned before, there are three different ways to make rice flour.
Using a High Speed Blender
The first being to place the rice in a freezer bag and freeze it for about 1 to 3 hours.
The freezing process will allow the rice grain to brake down much easier in the blending process. For this method, you will need a high speed blender.
I tried using my food processor, and needless to say, it did not work. It sure did make some rice flour, but most of the rice remained in a chopped grain form. So you’ll definitely need a high speed blender.
Once the rice has been frozen, take it out of the freezer, and place it into a high speed blender. Process it until all the rice grains have turned into flour.
If the rice does not fully turn to flour from the first time you process it, you can process it again. Just make sure to give the blender a break between each time you process it or blend it.
Once it is fully processed, take a fine sieve or a sifter and sift the rice flour. This will insure that you do not have any grains left in the flour as this can affect the texture of your final product.

Using the Soaking Method
The second method is the soaking method. You can use this method if you do not have a high speed blender, or if you just have a regular food processor.
This is a simple method, but it is somewhat time consuming, and it requires some tending to.
Soak the rice grains in cold water for an hour or two. Drain, and place the rice grains on a clean dish towel.
Make sure to spread them in an even thin layer to allow maximum amount of air exposure for each rice grain.
Let them dry for about a half hour or so, or until you notice that the rice grains aren’t soaking wet.
When you take a rice grain in between your fingers and press it, it should crumble under the pressure of your fingers alone. If this does not happen, then perhaps the type of rice that you chose needs a longer soaking period.
Once the rice grains are somewhat dry, and they do crumble under pressure (pun intended), Place them in a blender or a food processor, and process until they turn into flour.
Just as the previous method, you will need to give the blender or food process some time to rest between each processing period; otherwise, you’ll end up with a dead blender or food processor.
Once the rice is fully processed into flour, brake up it by rubbing it between your palms to eliminate any lumps.
Dehydrating Rice to Take the Moisture Out
Place on a baking sheet and spread evenly. You can let it dry fully while being exposed to direct sunlight and air, or you can place it in your oven on dehydrate mode for 15 minutes.
If your oven does not have a dehydrate mode, preheat it until it reaches 125 F. Turn it off, and place the rice flour in the oven to dehydrate. Since it is not a consistent 125 F it might take it longer than 15 minutes to dehydrate.
It is also important to mention that it might take you a longer or a shorter time to dehydrate your rice flour depending on the amount that you have made, and how stable your oven temperature is. Therefore, it is important to check on it periodically to ensure that it does not brown or burn.
Once it is fully dehydrated, you can run the it in the food processor again to eliminate any clumps of flour that might have stuck together. Sift and store in a resealable plastic bag.
How to Make Rice Flour Using a Grain Mill
The third method, and the easiest method is to use a grain mill.
There are many different types of mills out there. Some wet grain mills, and some dry grain mills. What I have is a simple Kitchen Aid attachment.
It is a dry grain mill which means nothing wet can come in contact with it. I do not even wash it just to ensure that there aren’t any clumped up grains on the inside.
I cannot speak for other mills, but I can speak for what I know.
For the Kitchen Aid attachment, you will need to make sure that it is plugged in into your machine according to the manufacturer’s directions.
On my kitchen aid, I have a latching mechanism, and a nob that ensures that the attachment will not be turning round and round, and getting thrown at you in the end.
If you do not attach it correctly, this might happen to you (This did happen to me once after I thought that I had it attached correctly). So practice safety and follow the manufacturer’s direction for best results.
Milling the Rice
I am not sure if all kitchenaids are the same, but on the one that I have I need to bump the speed up to 10 for it to be able to mill grains with this specific attachment.
Also this attachment should have the ability to adjust the size of grain that is coming out. So let’s say you were milling corn, and you want coarse corn meal, you can adjust the nob to give you coarse corn meal.
For rice flour however, you will need to place it on the finest setting possible. Turn up the speed to the highest setting possible, and drop the rice grains into the milling compartment.
Make sure to place a bowl under the ejection valve so that you do not end up with a mess on your hands.
For this method, you do not need to sift the flour as the mill automatically does it for you. That’s it for this method. Your rice flour is now ready to be used.
How to Properly Store Rice Flour
To store the rice flour, you could store it in a food safe container in a cool place in your pantry, away from direct sunlight. It is best to store it in an air-sealed container.
BPA free plastic or glass containers are best for food storage because they stop critters from accessing your food.
However, if you wish for your rice flour to last longer, you can store it in the freezer. It will stay fresh for a much longer period of time when placed in the freezer.
When you are ready to use it, simply take it out of the freezer and use it.
To store your rice flour in the freezer, you can double bag it in resealable freezer bags. Make sure to remove all the air from the bags. Double bagging it will ensure that your rice flour will stay contained, and it would be less likely for the flour to escape containment.
Pin This Post!

More Gardening and Recipe Related Topics
How To Make Gluten Free Sourdough Starter
Shop This Post
Anthony’s gluten free products
Tell Us What You Think!
What do you normally use rice flour for? Do you use it to make bread, thicken stews, dust your counter, make noodles? We would love to know how you use it!
Don’t forget to share this post if you found it valuable!
Disclosure Policy
Disclosure: Some of the links in this post are “affiliate links”. This means if you click on a link and purchase the item, I will get an affiliate commission. It will not cost you any extra money, but it will help me pay for this website, and it will help me to keep providing you with helpful articles such as this one. I only post links to products that I personally use and love, or to products that I wish I could have, and that could be of value to you. The information that I provide you with, my blog, videos, and many resources are free.


Be the first to reply