
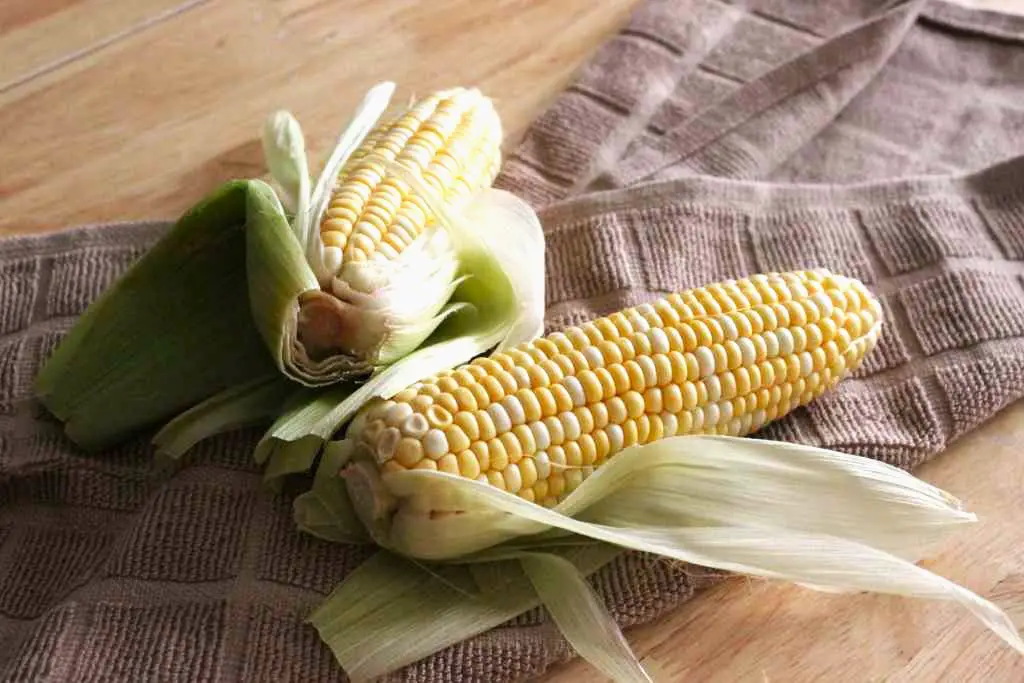
Learn how to cook corn on the cob using 6 easy methods. With its plump kernels and sweet taste, no wonder corn on the cob is a quintessential summer delight. The beauty of this versatile ingredient lies in the various cooking methods that can elevate its flavor and texture. In this blog post, we’ll delve into the culinary wonders of cooking corn on the cob through different techniques, each offering a unique and delicious outcome.
Disclosure: This post contains affiliate links. As an Amazon Associate I earn from qualifying purchases.

HOW TO BOIL CORN ON THE COB
Boiling corn on the cob is perhaps the most classic and straightforward method. Simply shuck the corn, bring a pot of water to a boil, add a pinch of salt, and immerse the corn for about 8-10 minutes. The result? Tender, juicy corn that retains its natural sweetness.
- Prepare the Corn:
- Start by peeling away the outer husks and removing the silk strands from each ear of corn. You can also trim the ends if needed.
- Boiling Water:
- Bring to a Boil:
- Place the pot on the stove over high heat and bring the water to a rolling boil.
- Add the Corn:
- Carefully place the prepared corn ears into the boiling water. Ensure that the corn is fully submerged.
- Cooking Time:
- Boil the corn for about 8-10 minutes. Cooking time may vary based on the freshness of the corn and personal preference for tenderness. Some prefer slightly crisp kernels, while others like them more tender.
- Check for Doneness:
- Test the corn for doneness by piercing a kernel with a fork or knife. If it easily goes through, the corn is ready.
- Drain the Corn:
- Once the corn is cooked to your liking, use tongs to carefully remove the ears from the boiling water. Allow excess water to drain off.
- Serve Warm:
- Serve the boiled corn on a platter while it’s still warm. You can add a pat of butter and sprinkle with salt or other seasonings for extra flavor.
Boiling corn on the cob is a simple and reliable method that preserves the natural taste and texture of the corn. It’s a versatile option that allows you to enjoy corn on its own or incorporate it into various dishes like salads, soups, or salsas. Whether for a summer barbecue or a cozy winter meal, boiled corn on the cob is a timeless favorite.

HOW TO GRILL CORN ON THE COB
Grilling corn on the cob imparts a delightful smokiness and char that takes this humble vegetable to a whole new level. Shuck the corn, brush it with oil or butter, and grill for 10-15 minutes, turning occasionally. The caramelization from the grill adds a depth of flavor that pairs perfectly with summer barbecues.
- Preparation:
- Peel back the husks of each ear of corn, leaving them attached at the base. Remove the silk, ensuring the corn is clean.
- Soaking:
- Place the corn in a bowl of water and let it soak for at least 15-20 minutes. Soaking helps prevent the husks from burning during grilling.
- Seasoning:
- Brush each ear of corn with olive oil or melted butter. Season with salt, pepper, and any additional herbs or spices of your choice. This step adds flavor and helps the corn caramelize on the grill.
- Recovering with Husks:
- Pull the husks back over the corn, covering it completely. This creates a protective layer during grilling.
- Tying the Husks:
- Secure the husks with kitchen twine or soaked corn husk strips. This step ensures the husks stay in place while grilling.
- Preheat the Grill:
- Preheat your grill to medium-high heat. Make sure the grates are clean and well-oiled to prevent sticking.
- Grilling:
- Place the corn on the preheated grill and close the lid. Grill for approximately 15-20 minutes, turning occasionally to ensure even cooking.
- Checking for Doneness:
- The corn is ready when the husks are charred, and the kernels are tender. You can also test doneness by piercing a kernel with a fork; it should be soft.
- Serve Hot:
- Once grilled to perfection, remove the corn from the grill. Let it cool for a few minutes before peeling back the husks and tying them with a decorative string for a rustic presentation.
- Optional Finishing Touch:
- Sprinkle the grilled corn with additional seasonings, like grated cheese, chili powder, or fresh herbs, for an extra burst of flavor.

HOW TO COOK CORN ON THE COB IN THE OVEN
For those without a grill, roasting corn in the oven is a fantastic alternative. Brush the shucked corn with olive oil or melted butter, season with salt and pepper, and roast at 400°F for 20-25 minutes. The result is golden kernels with a slightly crispy exterior and a burst of sweetness.
- Preheat the Oven:
- Preheat your oven to 400°F (200°C). Ensure the oven rack is in the middle position for even cooking.
- Preparation:
- Peel back the husks of each ear of corn, leaving them attached at the base. Remove the silk to clean the corn.
- Seasoning:
- Brush each ear of corn with olive oil or melted butter. Season with salt, pepper, and any desired herbs, spices, or grated cheese for added flavor.
- Recovering with Husks (Optional):
- Pull the husks back over the corn, covering it completely. This step is optional but can help retain moisture during roasting.
- Tying the Husks (Optional):
- Secure the husks with kitchen twine or soaked corn husk strips if you choose to cover the corn.
- Placing on a Baking Sheet:
- Place the prepared corn directly on a baking sheet lined with parchment paper or aluminum foil. Arrange them so they are not touching for even roasting.
- Roasting in the Oven:
- Roast the corn in the preheated oven for approximately 20-25 minutes. Turn the corn halfway through the cooking time to ensure even roasting.
- Checking for Doneness:
- The corn is ready when the kernels are tender and have a slightly golden or charred appearance. You can also test doneness by piercing a kernel with a fork; it should be soft.
- Serve Hot:
- Once roasted to perfection, remove the corn from the oven. Let it cool for a few minutes before serving.
- Optional Finishing Touch:
- Before serving, you can sprinkle the roasted corn with additional seasonings, herbs, or a squeeze of lime juice for a burst of freshness.

HOW TO COOK CORN ON THE COB IN A MICROWAVE
Microwaving corn on the cob is the ultimate time-saver. Wrap shucked corn in a damp paper towel, place it on a microwave-safe dish, and cook on high for 4-6 minutes. This method preserves the natural sweetness of the corn and is perfect for busy days.
Ingredients:
- Fresh corn on the cob
- Optional: Butter, salt, or other seasonings
Instructions:
- Preparation:
- Peel back the husks of each ear of corn, leaving them attached at the base. Remove the silk strands to clean the corn.
- Seasoning (Optional):
- Brush the corn with butter and sprinkle with salt or any desired seasonings. This step adds flavor to the corn during microwaving.
- Wrap in Damp Paper Towel:
- Dampen a paper towel under running water and wrap it around each ear of corn. The damp paper towel helps steam the corn as it microwaves, keeping it moist.
- Place in Microwave-Safe Dish:
- Arrange the prepared corn in a microwave-safe dish, ensuring they are not touching. This allows for even cooking.
- Microwave:
- Microwave the corn on high for about 4-6 minutes. Cooking times may vary based on the wattage of your microwave and the number of ears being cooked. Start with 4 minutes and check for doneness.
- Rotate and Check Doneness:
- Halfway through the cooking time, rotate the corn to ensure even cooking. Check for doneness by piercing a kernel with a fork; it should be tender.
- Let it Stand:
- Allow the corn to stand in the microwave for a couple of minutes after cooking. This helps it continue to steam and become fully tender.
- Serve Hot:
- Carefully remove the corn from the microwave, unwrap them from the paper towels, and serve them hot.
- Additional Seasoning (Optional):
- Before serving, you can add more butter, salt, or your favorite seasonings for an extra burst of flavor.
Microwaving corn on the cob is a time-efficient method, making it a great option for busy days or when you need a quick side dish. Whether enjoyed on its own or as part of a larger meal, microwaved corn retains its natural sweetness and juiciness.

HOW TO STEAM CORN ON THE COB
Steaming corn on the cob is a gentle method that preserves nutrients and freshness. Steam for about 7-10 minutes, maintaining the crispness of the kernels. This technique is ideal for those seeking a healthier alternative without compromising on flavor.
Ingredients:
- Fresh corn on the cob
Instructions:
- Preparation:
- Shuck the corn by removing the husks and silk strands. Rinse the corn under cold water to ensure it’s clean.
- Trimming (Optional):
- Trim the ends of the corn if needed. This step helps the corn fit into your steamer more easily.
- Boiling Water:
- Fill a pot with about 1-2 inches of water and place a steamer basket or a colander above the water. Make sure the water level is below the steamer basket.
- Placing Corn in Steamer:
- Arrange the prepared corn in the steamer basket, ensuring they are not crowded. If you don’t have a steamer basket, you can use a colander that fits securely over the pot.
- Cover and Steam:
- Cover the pot with a lid and bring the water to a boil over medium-high heat. Once boiling, reduce the heat to medium, maintaining a steady simmer.
- Steaming Time:
- Steam the corn for approximately 7-10 minutes. Cooking time may vary depending on the size and freshness of the corn. The kernels should be tender but not overly soft.
- Check for Doneness:
- Test the corn for doneness by inserting a fork or knife into a kernel; it should penetrate easily.
- Serve Warm:
- Once the corn is steamed to perfection, remove it from the steamer basket. Let it cool for a moment before serving to avoid burns.
- Season as Desired:
- Season the steamed corn with salt, pepper, or any preferred herbs and spices. You can also add a pat of butter for extra flavor.
- Serve as a Side or in Recipes:
- Serve the steamed corn on the cob as a delightful side dish or incorporate it into salads, soups, or other recipes.
Steaming corn is a gentle cooking method that retains its natural flavors and nutrients. It’s a fantastic way to enjoy corn as a standalone side or as part of a larger, flavorful dish. Whether for a weeknight dinner or a special occasion, steamed corn on the cob is a versatile and delicious addition to your menu.
HOW TO COOK CORN ON THE COB IN AN INSTANT POT
We pretty much all have a Instant Pot in our kitchen these days. It’s our most used kitchen assistant. Place shucked corn on the trivet, add water, and pressure cook for 2-3 minutes. This method delivers perfectly cooked corn in a fraction of the time, making it a convenient option for busy households.
Ingredients:
- Fresh corn on the cob
- Water
- Optional: Butter, salt, or other seasonings
Instructions:
- Preparation:
- Shuck the corn by removing the husks and silk strands. Rinse the corn under cold water to ensure it’s clean.
- Trimming (Optional):
- Trim the ends of the corn if needed. This step helps the corn fit into the Instant Pot more easily.
- Insert Trivet:
- Place the trivet inside the Instant Pot. The trivet helps elevate the corn above the water, preventing it from becoming overly saturated.
- Adding Water:
- Pour about 1 cup of water into the Instant Pot.
- Placing Corn on Trivet:
- Arrange the prepared corn on the trivet inside the Instant Pot. You can stack the corn vertically to fit more ears if necessary.
- Sealing and Setting:
- Close the Instant Pot lid, ensuring the steam release valve is in the sealing position. Set the Instant Pot to cook on high pressure for 2-3 minutes. The cooking time may vary based on the size and freshness of the corn.
- Natural Release:
- Allow the Instant Pot to naturally release pressure for 5 minutes. Then, carefully perform a quick release by turning the steam release valve to venting.
- Remove Corn:
- Open the Instant Pot and use tongs to carefully remove the corn on the cob.
- Season as Desired:
- Season the corn with butter, salt, or any preferred herbs and spices for added flavor.
- Serve Warm:
- Serve the Instant Pot corn on the cob warm as a delightful side dish.
Cooking corn on the cob in the Instant Pot is a time-saving method that produces perfectly cooked corn with minimal effort. It’s an excellent option for busy days or when you want to enjoy fresh corn without using the stove or oven. Whether served as a standalone side or included in various recipes, Instant Pot corn on the cob is a hassle-free and delicious addition to your meals.
Pin This Post!

More Gardening and Recipe Related Topics
Gluten Free Mediterranean Date Cookies – Maamoul Recipe
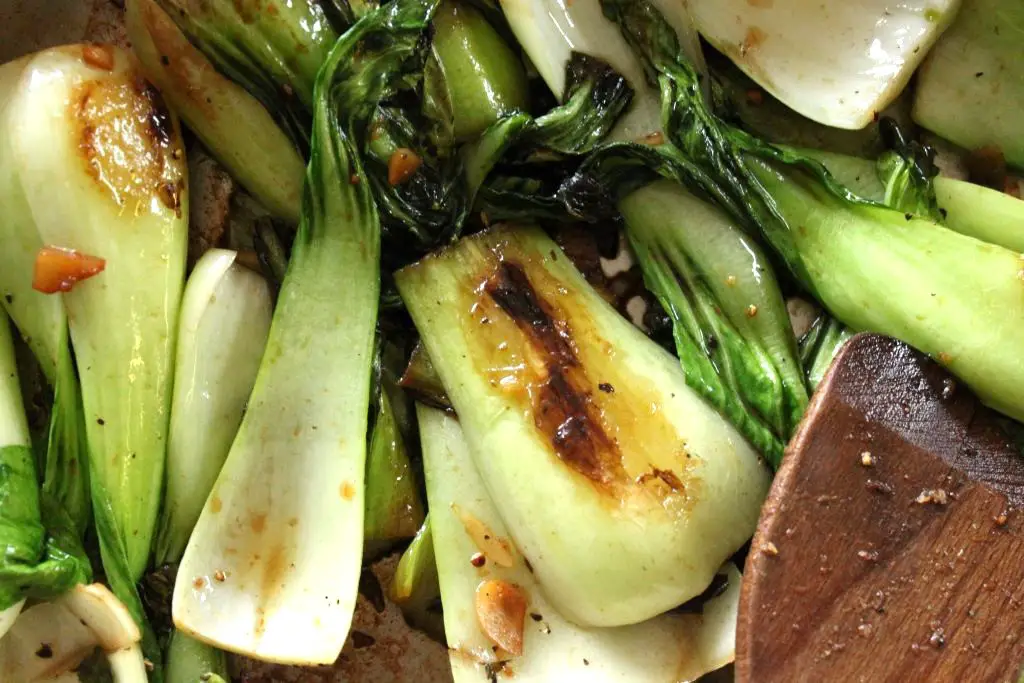
How TO Cook Bok Choy – From Farm To Table
Shop This Post
Tell Us What You Think!
Corn on the cob is a quintessential summer delight that can also be enjoyed during the winter using any of the above methods. It can be used in various dishes such as salads, soups, salsas, breads, and many more.
Tells us what is your favorite way of serving corn on the cob. Do you grow your own vegetables? Don’t forget to check our gardening posts to learn more about growing your own food!
Let us know if you have any comments or questions down in the comment section below.

HOW TO BOIL CORN ON THE COB
Ingredients
Equipment
Method
- Start by peeling away the outer husks and removing the silk strands from each ear of corn. You can also trim the ends if needed.
- Fill a large pot with enough water to completely submerge the corn. Add salt or sugar to the water if desired. The salt enhances the natural sweetness of the corn, while sugar can add a touch of sweetness.
- Place the pot on the stove over high heat and bring the water to a rolling boil.
- Carefully place the prepared corn ears into the boiling water. Ensure that the corn is fully submerged.
- Boil the corn for about 8-10 minutes. Cooking time may vary based on the freshness of the corn and personal preference for tenderness. Some prefer slightly crisp kernels, while others like them more tender.
- Test the corn for doneness by piercing a kernel with a fork or knife. If it easily goes through, the corn is ready.
- Once the corn is cooked to your liking, use tongs to carefully remove the ears from the boiling water. Allow excess water to drain off.
- Serve the boiled corn on a platter while it’s still warm. You can add a pat of butter and sprinkle with salt or other seasonings for extra flavor.
Be the first to reply