
Gluten Free Sourdough Pancakes
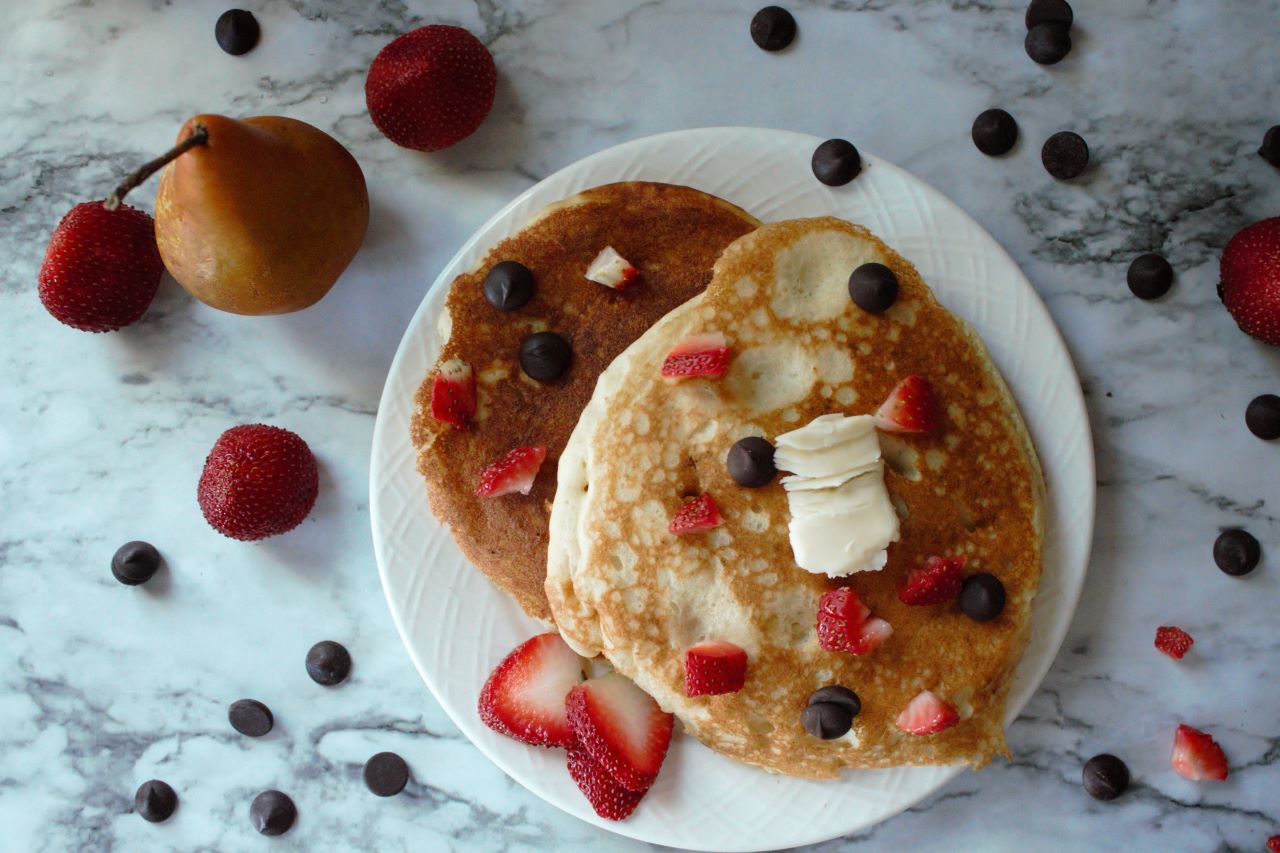
These by far are the fluffiest, most delicious, gluten free sourdough pancakes I have ever had. This recipe has now become my family’s favorite gluten free pancakes. These gluten free sourdough pancakes make the perfect Christmas breakfast, or weekend breakfast especially when paired with some perfectly cooked Oven Baked Bacon and some scrambled eggs.
Ingredients:
- Dry Ingredients
- Chantal’s Gluten Free All Purpose Flour Blend
- coconut flour (This is an affiliate link. If you buy any of Anthony’s products using this link, I get a small percentage of the money spent on your purchase at no additional cost to you)
- xanthan gum
- salt
- sugar
- Wet Ingredients
- fed Gluten Free Sourdough Starter
- lactose free milk
- melted butter equal, plus extra butter for buttering the pan
- eggs
- vanilla extract
- Rising Agents
- baking powder
- baking soda
Utensils
- Measuring cups
- Measuring Spoons
- Medium mixing bowl
- Whisk
- Small non-stick pan or a cast iron skillet
- Rubber Spatula
- Ladle
- Shrink wrap
- Spatula
Directions
These gluten free sourdough pancakes are so easy to make. They are the fluffiest, most comforting pancakes that you’ll ever come across. I try to make them at least once a week. They are easily adaptable if you want to add in some fruits or chocolate chips into them.
You can also prepare these pancakes ahead of time and store them in the fridge in a resealable plastic bag to make a quick breakfast. Or, you can store them in a freezer bag and put them in the freezer for whenever you need them. Just make sure to separate them using parchment paper.
To make this recipe, you’ll need a sourdough starter. If you haven’t made a sourdough starter yet, checkout my sourdough starter how to and recipe to get you started right on making your first gluten free sourdough starter along with instructions on how to care for it and keep it alive and healthy.

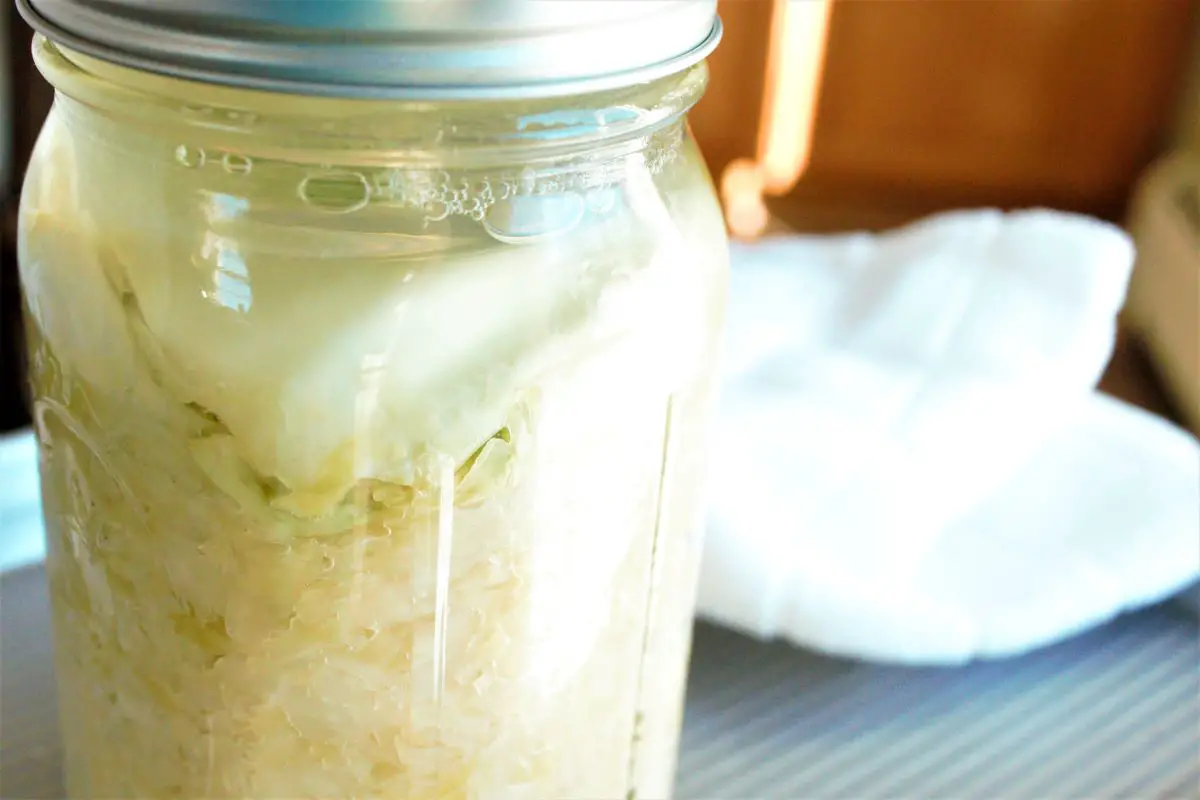
If you already have a sourdough starter, you’ll need to feed the sourdough starter before you begin. For more information on how to do that, checkout my gluten free sourdough starter link above. A well fed sourdough starter should resemble the one in the picture above. If you don’t have a gluten free sourdough starter yet, you can checkout my Gluten Free Pancakes recipe that does not include sourdough starter.
Before I do anything, the first thing that I like to do is to start melting the butter on low heat. This way, as I am getting things ready, it is slowly melting and getting ready to be added when I need it. Just make sure to keep an eye on it. You want to move it off the heat as soon as you see that it has completely melted. If you leave it for too long, it may begin to burn, and this will of course add a burnt butter flavor to your pancakes.

While the butter is melting, you’ll want to go ahead and prep your dry ingredients. So in a medium bowl, you are going to add Chantal’s Gluten Free All Purpose Flour Blend, coconut flour, salt, sugar, and xanthan gum.

Once all the ingredients are in the bowl, using a whisk, give them a quick mix to ensure that they are well blended. Otherwise, what could happen is that you may end up with clumps of xanthan gum when you add in the wet mixture. Mixing the dry ingredients will also ensure that the rest of the ingredients are equally distributed.

Once the dry ingredients are ready, you can start adding the wet ingredients. You’ll need to warm up the milk slightly until it is lukewarm before adding it into the mixture, and set it aside until you are ready to add it.


I like to add in the sourdough starter first because it will not clump up the dry mixture as the rest of the wet ingredients are being added. Add in the eggs, vanilla, and lukewarm milk. Using a whisk, give everything a good mix until you do not see any clumps.

At this stage, you’ll want to add in the melted butter which would have cooled slightly as it has been sitting and waiting to be added. This will minimize the risk of it accidently cooking the mixture as you are adding it in. Slowly pour in the butter into the sourdough pancake batter as you continue to whisk. Whisk vigorously until the butter is well incorporated.
Then, take a rubber spatula and scrape in the remaining butter into the batter. There are two reasons why you’ll want to do this. First, the obvious one which is of course you do not want to waist any precious butter because every bit matters.

Second, is that you do not want too much butter in the pan as you come in to cook the pancakes. If you have too much butter in the pan, what would happen is that the butter would burn even if you have the heat on low, and this will give your pancakes an undesirable burnt butter taste. It will also also make the bottom of the pancakes dark and crispy. Whisk the batter again to incorporate the butter.


using a spatula, scrape the edges of the bowl to make sure there is no pancake batter left around the edges because it will dry out, cover it with a plastic wrap, and set it aside for one to two hours to ferment.

The fermentation time is very critical, so keep this in mind before you start making this recipe. I have tried making this recipe without allowing the pancake batter to ferment, and even though it was still good, it was not nearly as good as when I have allowed the batter to ferment. So make sure to give the batter the time it needs to ferment. What you can also do, is that you can prepare this batter ahead the night before you need it without adding the rising agents, and allow it to ferment in the fridge overnight. The next day, you wake up, add in the rising agents, and boom, the pancake batter is ready in seconds.

You’ll know that the batter is well fermented when you see bubbles starting to form at the top of the batter. You can also tell by poking the batter using a spatula, and on the inside, the batter should appear at least slightly bubbly, and airy. Once this happens, then you are ready to move on to the next step.

Now that the sourdough pancake batter has fully fermented, you can sprinkle, and I mean sprinkle in the baking powder and baking soda. If you just throw them in without ensuring that they are equally spread out across the batter, you will risk clumping because both the baking soda and baking powder have the tendency to clump up when they are exposed to liquid. Whisk them in as soon as you sprinkle them onto the batter to prevent clumping. Set the batter aside for 2 to 3 minutes to allow the rising agents to get activated.

Do not leave uncooked batter with the rising agents in incorporated into it for longer than 20 minutes because it can affect the rise of the pancakes. You will end up with denser, not fluffy pancakes if you do so. Instead, if you do not want to eat all the pancakes at once, what you can do is use up all the batter to make the pancakes, and you can store the pancakes in a resealable plastic bag in the fridge for a quick breakfast or dinner. Just simply preheat them individually in the microwave when you are ready to use them.
Meanwhile, while the rising agents are getting activated, preheat a non-stick skillet or a cast iron skillet on medium to low heat. Once the pan is preheated and the batter is ready, you are now ready to cook the pancakes.

To cook the pancakes, grab a ladle full of batter and plop it into the pan. Using the bottom of the ladle, you’ll gently want to bounce it up and down across the surface of the batter. this motion will help you spread the batter across the surface of the pan. I like to use a pan that is the same size of the pancakes that I like to make. This way, my pancakes will always end up perfectly circular, but that’s who I am, and you do not have to have your pancakes look perfect or circular. You can make any shape you want!

As you spread the batter, make sure to not apply any pressure on the batter as you will end up deflating all the bubbles. This will in term cause the pancakes to be dense and heavy rather than light and fluffy. If while you were spreading the batter you accidently take some of the batter off the surface of the pan, you can use the bottom of the ladle again to spread the batter into that location.

Allow the batter to get cooked on the bottom for about a minute or two, or until you begin to see a slight golden brown rim forming around the pancakes, bubbles at the surface of the pancakes, and the batter is slightly drying around the edges of the pancakes. Once you see these signs, it is time flip the pancake.

To flip the pancake, run the edge of a spatula under one side of the rim of the pancake. Once the spatula is able to get under the rim, run the spatula under and around the rim, and under the center of the pancake. Lift the pancake off the pan, and with a quick plopping action, flip the pancake unto the opposite side.

Allow the top of the pancake to get cooked for about 10 to 15 seconds or until golden brown. You can check after the 10 seconds to see if the pancake is done. To do so, simply use the spatula to lift the pancake off the pan and check if it is has achieved the coloring that you like, or golden brown.

Repeat the cooking process with the remaining batter. You can serve it with some fruits, butter, maple syrup, honey, chocolate, whipped cream, or anything that you might like with your pancakes. You can also serve it with some scrambled eggs, and Perfectly Cooked Oven Bacon.

Gluten Free Sourdough Pancakes
Ingredients
Equipment
Method
- Make sure the sourdough starter is fed and frothy before you begin making these pancakes.
- Melt the butter in a small non-stick pan on low heat. Once the butter has melted, remove from heat and set aside.
- Meanwhile, in a medium bowl, add in Chantal’s Gluten Free All Purpose Flour Blend, coconut flour, salt, sugar, and xanthan gum. Using a whisk, mix everything together until well combined.
- Add in the sourdough starter, eggs, milk, and vanilla extract. Whisk until well combined.
- Slowly add in the butter while whisking the mixture in order to prevent the butter from cooking it. Using a rubber spatula, scrape in any leftover butter into the mixture. Whisk for about 30 seconds to ensure everything is well combined and the mixture is smooth and not clumpy.
- Cover the mixture and set aside in a warm place away from draft for 1 to 2 hours or until it is bubbly and sort of frothy.
- Once the mixture becomes light and bubbly, sprinkle in the baking powder and baking soda and whisk until well combined. Set aside for a couple minutes to allow the rising agents to take action.
- Meanwhile, preheat a non-stick pan or a cast iron skillet on medium to low heat.
- You can cover the surface of the pan with some butter to prevent the pancake from sticking. I find that if I use a non-stick pan, I do not need to add any butter to prevent the pancakes from sticking to the pan.
- Once the pan is heated and the mixture is ready, using a ladle, pour in some of the mixture on to the preheated pan, and lightly using the bottom of the ladle spread the mixture along the surface of the pan by gently bouncing the ladle along the surface of the mixture to make a circular shape. Try not to apply any pressure as you perform this step because this will deform the pancake and cause it to deflate.
- Allow the pancake to get baked at the bottom for a few minutes until you start seeing a light brown rim around the pancakes and the surface of the pancake becomes bubbly and slightly begins to dry. Once the pancake reaches this stage, it is now time to flip it. Allow it to bake after flipping it for about 10 to 15 seconds or until golden brown. You can check after about 10 seconds of flipping to see if it has achieved the desired color.
- Continue to cook the pancakes in the same manner mentioned above. You may need to add a bit of butter between every couple pancakes, and you may also need to adjust the heat as you continue to cook the pancakes.
- Now it’s time to serve with maple syrup, or honey and your favorite topping.
Video
Disclosure: Some of the links in this post are “affiliate links”. This means if you click on a link and purchase the item, I will get an affiliate commission. It will not cost you any extra money, but it will help me pay for this website, and it will help me to keep providing you with helpful articles such as this one. I only post links to products that I personally use and love, or to products that I wish I could have, and that could be of value to you. The information that I provide you with, my blog, videos, and many resources are free.
Be the first to reply