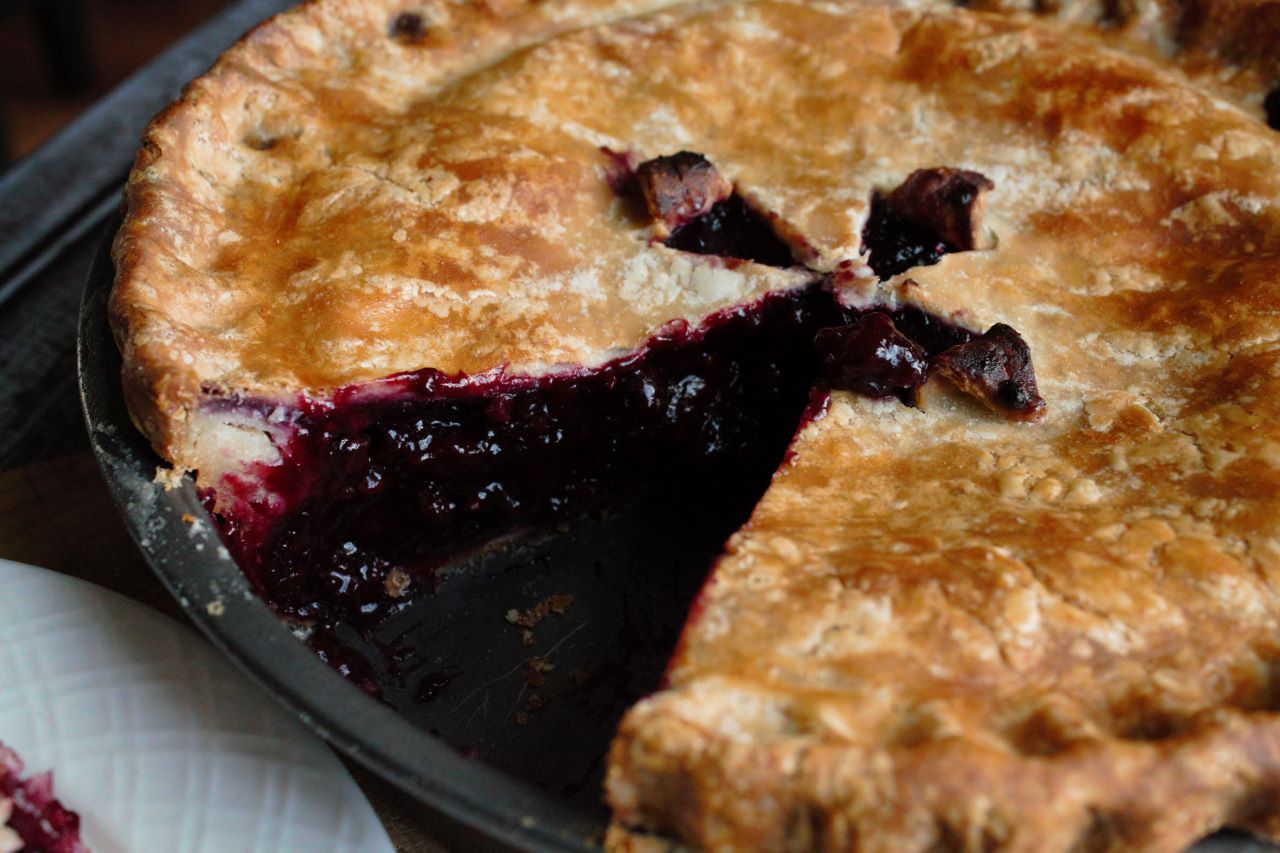
This Gluten free pie crust is super flaky, buttery, and delicious. It is pliable and easily workable, and it has some stretch to it which allows you to easily shape it into anything you like. Your search for gluten free pie crust recipes is over because this is hands down the best gluten free pie crust. It can be used with any pie you can imagine.
Jump to RecipeINGREDIENTS FOR MAKING THE MOST AMAZING HOMEMADE PIE CRUST
- Chantal’s All-Purpose Gluten Free Flour Blend
- butter If you want to turn this into a dairy free gluten free pie crust recipe, you can choose to use shortening instead of butter
- eggs We will get into more details about why using eggs is important in making a gluten free pie crust.
- salt Whether you will be using this pie crust recipe for desserts or for savory dishes, salt is a key ingredient in both applications. Salt helps in balancing out the flavors taking them from bland into amazing.
- sugar Even if you were going to use this pie crust recipe for chicken pot pie, it is still important to add sugar.
Just as salt plays an important role in balancing out flavors, sugar also plays that role in savory dishes. If it concerns you, you can slightly reduce the amount of sugar that is being used. - Lactose free dairy milk Again, if you want this to be a gluten free dairy free pie crust recipe, you’ll have to use other alternatives.
I suggest using a high fat dairy free milk such as coconut milk, or even coconut cream. The high fat is what makes this to be a flaky pie crust recipe. - xanthan gum Essential for allowing the pie crust to hold its structure, and keep it from falling apart and crumbling after being baked.
UTENSILS FOR MAKING THIIS FLAKY PIE CRUST RECIPE
- Medium Bowl
- Measuring spoons
- Measuring cups
- Knife For cutting out the butter into chunks
- fork For mixing
- Shrink wrap To keep the pie crust from drying out.
- Rolling pin
RESEARCH INVOLED IN DEVELOPING THE BEST GLUTEN FREE PIE CRUST
For many months now, I have been trying to develop the most perfect, gluten free flaky pie crust that you could come across. Now that the holiday seasons are approaching, I was on the hunt to discover what makes a pie crust so wonderfully flaky.
So I did tons of research by following professional bakers, studying their ingredients, and techniques.
You would think that these were professional gluten free bakers, but not so at all. The pie crusts that they handled were all wheat, and mostly everything that they created had wheat ingredients in it.
So why did I study their ingredients and techniques? You see, it is as much about the techniques, as it is about the ingredients.
Most people when they talk about gluten free baking, they say that it is nothing like wheat baking, but I have discovered that this is not entirely true.
From my 8 years of experience of baking gluten free goods, I have discovered that even though gluten free ingredients behave differently than wheat because of the lack of gluten and stretch, they still require almost the same techniques in preparation.
Similarities between gluten free recipes and non gluten free recipes
For instance, I have heard many say that gluten free bread does not require kneading because it has no gluten. Therefore it is not necessary to kneed it in order to activate the gluten.
Even though the second part of this statement is true, since it is “gluten free” it does not mean that it does not require Kneading. In fact it benefits tremendously from, not necessarily kneading, but agitating, or whipping.
Since gluten free bread does not have the capability of stretching and holding maximum air bubbles, the whipping action allows the bread to behave in the same manner as a whipped cream or egg whites would when they are whipped.
Even though whipped cream does not have gluten in it, the continuous whipping action shapes the fat globules in a way that allows them to hold air bubbles.
In effect, when you whip gluten free bread, a similar reaction is happening allowing the bread to hold on to the air bubbles.
KEY INGREDIENT FOR THE BEST PIE CRUST RECIPE GLUTEN FREE

When it comes to pie crust, the same techniques that are applied to achieving a super flaky glutinous pie crust are required to achieve a super flaky gluten free pie crust.
One important ingredient, protein. Protein allows the crust to be stretchy and pliable.
Having a stretchy and pliable crust is very important for when it comes to rolling the crust, placing it into the pie plate, carrying it without fear of breaking, and shaping it into whatever shape you want.

For the form of protein in this pie crust, I chose eggs.
Eggs are a naturally stretchy form of protein unlike collagen which is less stretchy.
if you are thinking of turning this into a vegan gluten free pie crust recipe, think of the form of protein that you’ll need to use. Think of how stretchy that protein can be.
The stretchiness of a protein will also determine how flaky the pie crust will be. We want this gluten free pie crust to be able to hold on to itself to allow the butter to steam on the inside creating the luscious flaky layers.
CHILLING THE INGREDIENTS FOR THIS PIE CRUST RECIPE
Before you begin creating the pie crust, the most important thing to do is to chill all the utensils and ingredients. The colder they are, the better the outcome.
What we want to avoid here is melted butter. If you end up with melted butter, it will mix in with the dry ingredients resulting with a crumbly dough rather than a super flaky dough.
A flaky dough is a dough that has multiple layers that can peel off of each other when baked. Sort of like multiple layers of covers on top of each other. Think of pastry dough.
Another source of protein is milk. Milk will also make the dough extra flaky because of the fat that is in it. So do not use skim milk if you want the dough to be extra flaky.
In a medium bowl that have been chilled, place the flour, salt, sugar, and xanthan gum. Mix everything well.
PIE CRUST RECIPE BUTTER TECHNIQUE FOR BEST RESULTS

Cut the butter into half inch cubes by dividing it into quarters the long way, and cutting the quarters into half inch cubes.
I simply cut the butter on the wax paper that it was wrapped in. No chopping board needed!

Place the butter on the flour mixture and refrigerate everything.
Do not put any covering on it because this might cause condensation to occur, therefore water droplets will form on the covering and drip onto the ingredients. So just keep it uncovered to avoid future problems.
You will need to keep it in the fridge for 30 minutes. This will allow the butter to get cold again after it has been handled and exposed to the heat of your hands. it will also allow the flour mixture to get cold.
Remember, cold ingredients means flaky pie crust. So I will be saying “return it to the fridge” a whole bunch of times.
After the cooling stage is over, coat every cube of butter with the flour mixture. You want to trap the butter within the flour mixture at all times. Therefore, it is important to continue to coat the butter with the flour mixture in every step of the way to ensure a flaky pie crust.

After coating the butter with the flour, press each cube of butter between your fingers until they are about the thinness of a penny.
You can break the pressed pieces of butter to be around the size of a quarter. Coat the butter again with the flour mixture.
If at the time you are pressing and coating the butter, you notice that your hands are getting warm, and the butter is slightly melting, return the bowl back into the fridge, uncovered.
INCORPORATING THE WET INGREDIENTS INTO THE PIE CRUST

Once all the butter is pressed and coated, make a well in the center. Beat the egg and place it into the well which you have created.

Using the help of a fork, equally distribute the egg among the mixture by stirring it into the flour/butter mixture while taking care not to break the butter into smaller pieces.
If while you are doing this step you notice that the dough is clumping in one place and it is dry everywhere else, using your hands, gently break up the clump or clumps and distribute it among the mixture to ensure that the egg is touching most of the dough.
After all, we are trying our best to not overwork the pie crust dough.
There will be no kneading action involved in making this gluten free pie crust, but it will be more of a combining action.
Adding in the milk to the pie crust

Begin adding the milk 1 tablespoon at a time and gently mix the dough using your hands.
Remember, no overworking the dough. If you see clumps are beginning to form, break them up to release the moisture into the rest of the dough as equally as possible.
If at any stage you begin to feel that your hands are beginning to warm up, the butter is melting when it touches your hands, and the dough is feeling a little warm, cover everything with a plastic wrap making sure that the plastic wrap is directly touching the dough, and place it back into the fridge for about 10 minutes.
The plastic wrap is going to prevent the pie crust from drying out.

Combining the pie crust dough
Once the pie crust dough begins to stick to itself, try combining it to see if there are any dry spots, if it needs more milk, or if it is just right.
To combine it, simply gather the dough with your hands and gently press it together to form a ball.
If you see that some pieces are falling off the dough and not sticking to it, separate the dough that is sticking together from the dry pieces, sprinkle the dry pieces with some milk and gently mix them together.
Once they feel “wet” enough, bring the separated dough and combine it with the rest. Try to form the pie crust dough back into a ball.

To know if the pie crust is ready, it should not feel dry and fall apart as you lift it. If it does, add a little more milk into the dry spots and gently fold it together.
Another way to tell if your gluten free pie crust is done, is when you combine it together, it should hold together well, nothing should fall apart, and it should not stick to your hands.
If the dough is sticky, you can fix that problem during the folding process by sprinkling extra flour onto the dough as you roll it.
Once the dough is ready, wrap tightly with shrink wrap to prevent it from drying, and refrigerate for 30 minutes to an hour.

THE FOLDING PROCESS FOR THIS GLUTEN FREE PIE CRUST

Sprinkle the counter with Chantal’s all-purpose gluten free flour blend. Place the dough onto the flour sprinkled counter.
Sprinkle the dough with a little bit of flour. You do not want to sprinkle too much flour as it will dry out the dough.
Using a rolling pin, roll the dough into a rectangle of about a ¼ inch thickness.
As you roll the dough, continue to move it from one place to the other and turn it to ensure that the bottom of the dough is constantly being coated by flour.
This last step will prevent the dough from sticking to the counter. You might also need to lightly sprinkle the top with some flour every now and then to prevent the rolling pin from sticking to the dough.

Once the pie crust is rolled out to a rectangle, that is quarter inch in thickness, begin folding the long way by folding one side into the center of the rectangle, then folding the opposite side into the center of the rectangle, and last fold this entire shape in half as if you are closing a book.
Wrap the folded pie crust tightly with plastic wrap and place into the refrigerator for 10 minutes.

Roll the pie crust again onto a lightly floured surface into a rectangle, quarter inch in thickness. Fold it into a letter shape. Wrap in plastic wrap and place back into the fridge for 10 minutes.
For this last fold, you will repeat the steps done in the first fold. Roll, fold into a book shape, wrap with plastic wrap, and place back into the fridge for 30 min to 1 hour before using.

USING YOUR GLUTEN FREE PIE CRUST
After the pie crust has fully chilled, now it is ready to be used in any pie recipe that you can imagine. All you have to do is divide it in half and roll each half to the desired shape.

It is important to note that you will need to refrigerate the dough for 30 min after rolling it and shaping it into the pie pan before baking. To do so, wrap it with plastic wrap to prevent it from drying and refrigerate.
The final refrigeration would be after you have placed the filling into the pie and covered it with the crust. You will need to refrigerate it for 30 minutes to an hour while covered in plastic wrap.
Follow the baking direction for the pie recipe that you are using.
This gluten free pie crust recipe can be used in any recipe you can imagine. It’s a pie crust recipe for chicken pot pie, it’s a pie crust for apple pie, it’s a pie crust for peach cobbler, it’s a dessert pie crust recipe, it’s a savory pie crust recipe, it’s an everything pie crust recipe.
If you’re wondering, “What dessert can I make with pie crust?” Wonder no more! I have just the perfect dessert recipe for you using this gluten free pie crust. Try out this delicious Gluten free apple pie.
GLUTEN FREE PIE CRUST FROZEN?
If you’re wondering whether you can freeze this gluten free pie crust or not, the answer is yes.
To freeze, divide the pie crust into two equal dough balls, wrap them with three layers of plastic wrap, place in a freezer bag, remove as much air as possible, seal, and place into freezer.
Another way of storing a pie crust into the freezer is by buttering a pie pan, rolling out the dough, placing it into the pan, shaping it, then wrapping it with three layers of plastic wrap, wrapping it with aluminum foil or placing it in a freezer bag, and then freezing it.
Using a pie crust from frozen
To use a frozen pie crust, remove it from the freezer, place it into a refrigerator, and allow it to thaw for one to two days.
Once it is fully thawed, you can use it in the same way as you would use a fresh pie crust.
MORE GLUTEN FREE RECIPES
Gluten Free Brioche Bread With Date Filling
Vegan And Nut Free Gluten Free Soft Pretzels
Nut Free- Vegan – Gluten Free Focaccia Bread Recipe
Gluten Free Zalabia (Mediterranean Vegan And Nut Free Donuts)

Gluten Free Pie Crust
Equipment
- Medium bowl
- Measuring Spoons
- Measuring cups
- Knife
- fork
- Shrink wrap
- Rolling Pin
Ingredients
- 2 ½ cups of Chantal’s All-Purpose Gluten Free Flour Blend 360 g
- 2 sticks of butter 226 g
- 1 egg to help with elasticity
- 1 teaspoon salt 5 g
- 2 tablespoons sugar 30 g
- 10 – 12 tablespoons milk adjust amount accordingly
- 1 teaspoon xanthan gum 5 g
Instructions
- To ensure a perfect pie crust, refrigerate all utensils and ingredients for about 30 minutes before you begin making the pie crust. Melting butter, means a crumbly pie crust that resembles a crisp rather than a crust. To prevent that, we will be refrigerating everything multiple times.
- Place the flour, salt sugar, and xanthan gum into a bowl and mix to combine everything together.
- Cut the butter into half inch cubes by dividing it into quarters the long way, and cutting the quarters into half inch cubes.
- Place the butter on the flour mixture, and place the bowl with the ingredients back in the fridge for another half hour. This step is essential as you do not want the butter to melt. Cooling down the flour will help to keep everything cold, including the butter. Another important thing to mention is that the butter would begin to melt after being exposed to the heat of your hands.
- After the cooling stage is over, coat every cube of butter with the flour mixture. It is important to continue to coat the butter with the flour mixture in every step of the way to ensure a flaky pie crust.
- Press each cube of butter between your fingers until they are very thin, and coat them with flour again. You want the pieces of butter to be about the size of a quarter in diameter, but they do not have to be circular, and a little thinner than the thickness of a quarter. Toss the butter with the flour mixture to ensure that all the pieces of butter are coated again. If during this process you begin to feel that your hands are getting too warm and the butter begins to melt as you touch it, place everything back in the fridge without covering it to prevent water pooling over the crust due to condensation.
- Once all the pieces of butter are at the right size, they are well coated with the flour mixture, and all the ingredients are cold, create a well in the center of the mixture. Beat the egg, and place it into that well that you have created.
- Using the help of a fork, equally distribute the egg among the mixture by stirring it into the flour/butter mixture while taking care to not break the butter pieces any smaller. If you see a clump of dough while the rest of the ingredients are dry, gently break up that lump without breaking the butter, and distribute it among the mixture.
- Begin to add the milk 1 tablespoon at a time, and gently mix the dough using your hands without overworking it. If you see any clumps beginning to form, break them up to release the moisture into the rest of the dough. If at any stage you begin to feel that your hands are beginning to warm up, the butter is melting when it touches your hands, and the dough is feeling a little warm, cover everything with a plastic wrap and place it into the fridge for 10 minutes.
- Once the dough begins to stick to itself, try to combine it to see if there are any dry spots, if it needs more milk, or if it is just right. To combine it, simply gather the dough with your hands and gently press it together to form a ball. If you see that some pieces are falling off the dough and not sticking to it, separate the dough that is sticking together from the dry pieces, sprinkle the dry pieces with some milk, gently mix them together, once they feel “wet” enough, bring the separated dough and combine it with the rest. Try to form the dough back into a ball.
- To know that the dough is ready, it should not feel dry and fall apart as you lift it. If it does, add a little more milk into the dry spots and gently fold it together. Another way to tell if the dough is done, is if you combine it together, it holds together well, nothing falls apart, and it does not stick to your hands. If the dough is sticky, you can fix that problem during the folding process by sprinkling extra flour onto the dough as you roll it. Once the dough is ready, wrap tightly with shrink wrap to prevent it from drying, and refrigerate for 30 minutes to an hour.
- The folding process requires 3 folding steps.
- Sprinkle the counter with Chantal’s all-purpose gluten free flour blend. Place the dough onto the flour sprinkled counter. Sprinkle the dough with a little bit of flour. You do not want to sprinkle too much flour as it will dry out the dough. Using a rolling pin, roll the dough into a rectangle of about a ¼ inch thickness. As you roll the dough, continue to move it from one place to the other and turn it to ensure that the bottom of the dough is constantly being coated by flour. This step will prevent the dough from sticking to the counter. You might also need to lightly sprinkle the top with some flour every now and then to prevent the rolling pin from sticking to the dough.
- Once the dough is rolled out to a rectangle, quarter inch in thickness, begin to fold the long way by folding one side into the center of the rectangle, then folding the opposite side into the center of the rectangle, and last fold this entire shape in half ass if you are closing a book. Wrap tightly with plastic wrap and place into the refrigerator for 10 minutes.
- Roll the dough again onto a lightly floured surface into a rectangle, quarter inch in thickness. Fold it into a letter shape. Wrap in plastic wrap and place back into the fridge for 10 minutes.
- For this last fold, you will repeat the steps done in the first fold. Roll, fold into a book shape, wrap with plastic wrap, and place back into the fridge for 30 min to 1 hour before using.
- After the dough has fully chilled, now it is ready to use in any pie recipe that you can imagine. All you have to do is divide it in half and roll each half to the desired shape.
- It is important to note that you will need to refrigerate the dough for 30 min after rolling it and shaping it into the pie pan before baking. To do so, wrap it with plastic wrap to prevent it from drying and refrigerate.
- The final refrigeration would be after you have placed the filling into the pie and covered it with the crust. You will need to refrigerate it for 30 minutes to an hour while covered in plastic wrap.
- Follow the baking direction for your pie and enjoy!
Video
Notes
Disclosure: Some of the links in this post are “affiliate links”. This means if you click on a link and purchase the item, I will get an affiliate commission. It will not cost you any extra money, but it will help me pay for this website, and it will help me to keep providing you with helpful articles such as this one. I only post links to products that I personally use and love, or to products that I wish I could have, and that could be of value to you. The information that I provide you with, my blog, videos, and many resources are free.


Be the first to reply